
 (6 votes, average: 4.33 out of 5)
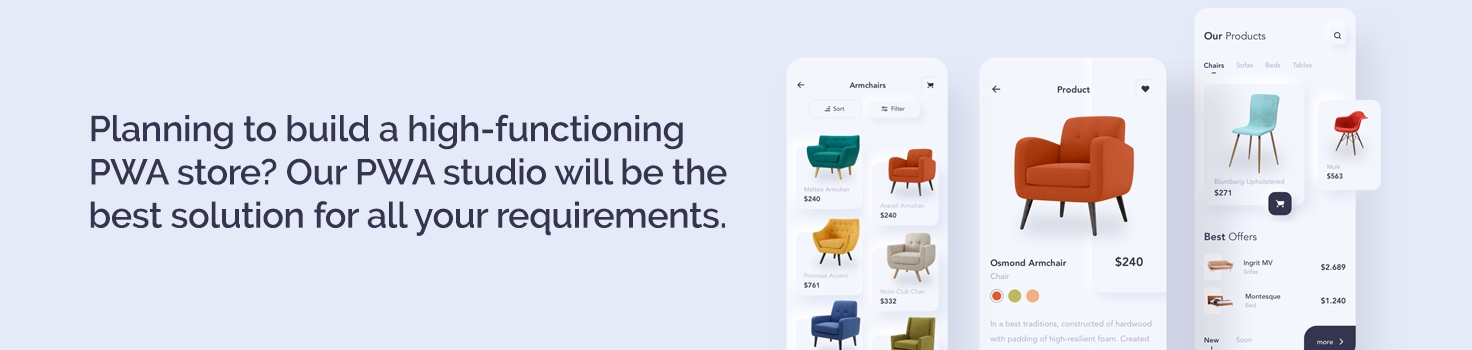
Nowadays, eCommerce businesses from all around the world have started implementing Progressive Web Application (PWA) slowly and steadily to get a competitive edge over their competitors.
One reason for this is mainly because the majority of consumers are preferring to shop through mobile devices. So, it makes sense to transform their standard online stores into Progressive Web Applications to provide a mobile app-like experience.
But unfortunately, when it comes to PWA, most Magento merchants don’t have a single clue about the PWA installation process.
If you fall under this group, there is no need to stress out.
Today, we’re going to teach you guys how to install PWA studio in Magento 2.3.
Step-by-Step Process to Install and Setup PWA Studio in Magento 2.3
Below is a comprehensive tutorial that is solely created for helping Magento 2 store owners install PWA Studio in Magento 2.3.
- Server Setup for Magento 2:
- Install Nginx with apt-get -y install nginx.
- Install and configure php-fpm with PHP 7.2.X.
- Start php-fpm service with systemctl restart php7.2-fpm.
- Installation & Configuration of Magento 2 on Server:
- Install Magento 2 using Composer.
- Obtain Magento 2 Authentication Key and Magento Metapackage.
- Install Yarn:
- Configure the Debian repository.
- Install Yarn through the Debian package repository.
- Set up the Yarn path in your profile.
- PWA Installation in Magento 2.3:
- Clone PWA-Studio repository with git clone https://github.com/magento-research/pwa-studio.git.
- Install project dependencies with yarn install.
- Generate SSL certificate for the Venia storefront.
- Create and update .env file in PWA.
- Build artifacts with yarn run build and start the server.
- Start The Server
- Configure Nginx reverse proxy to handle client requests.
Let’s dive deep into each installation step.
Step 1 – Server Setup for Magento 2
The first step of the Magento 2.3 PWA installation process is to set up the server for Magento 2.
For this, you need to fulfill certain requirements for setting up Magento 2 in the right way.
First, you need to utilize the Nginx for setting up the server.
Magento platform fully supports the Nginx 1.8 and it only requires the latest version of php-fpm for installation.
Now, the installation varies from the operating system to operating system.
In this tutorial, we’ll be assuming Ubuntu 16 operating system to set up the Magento 2 server using Nginx.
Install Nginx
Execute the below command to install the server using Nginx:
apt-get -y install nginx
Install & Configure php-fpm
After installing Nginx, you need to make sure that the Magento platform is working in a full-fledged manner on the server.
Therefore, you will need to use various PHP extensions to make sure the proper functioning of Magento 2 PWA.
Follow the below steps to install and configure php-fpm.
Install php-fpm and php-cli
Execute the following command to install the latest version of PHP 7.2.X:
apt-get -y install php7.2-fpm php7.2-cli
Open php.ini file using the following commands:
vim /etc/php/7.2/fpm/php.ini
vim /etc/php/7.2/cli/php.ini
Edit php.ini files to match the required PHP settings:
memory_limit = 2G
max_execution_time = 1800
zlib.output_compression = On
Now, save all files and close the editor.
Next, you need to start the php-fpm service to ensure proper installation of the server.
Execute the following command to restart the php-fpm service.
systemctl restart php7.2-fpm
Step 2 – Installation & Configuration of Magento 2 on Server
Once you have set up the server, the next step of the process is to install and configure Magento 2 on the Nginx server.
There is a multitude of ways to install Magento 2 on the server, but for this tutorial, we’re going to use the composer for the Magento 2 installation.
Magento 2 Installation using Composer
The primary function of the Composer in the Magento 2 installation process is to effectively manage all Magento 2 components and their dependencies.
Hence, we need to fulfill the following two requirements.
1. Obtain Magento 2 Authentication Key
To obtain the Magento 2 Authentication Key, you need to login to your Magento account and click on the below-given link to get your Magento 2 authentication key.
https://marketplace.magento.com/customer/accessKeys/
2. Get Magento Metapackage
Magento Metapackage is basically responsible for grouping all extensions into one unit that comprises multiple packages.
Please follow the below instructions to get Magento Metapackage:
- Login to your Magento server and switch to Magento File System Owner.
- Navigate to the root directory that you configured as the virtual host docroot.
- Use the following command to create a Composer project for either Magento open-source or Magento community edition.
composer create-project --repository=https://repo.magento.com/ magento/project-community-edition:2.3.1 magento2.3.1
If you face any error while creating the Composer project, it might be due to typo errors in your command. However, if you’ve double-checked the command and think it’s right, then you should hire Magento Development Agency for help.
Step 3 – Install Yarn
Yarn basically stands for Yet Another Resource Negotiator. Developed by Facebook, Yarn is an extremely efficient packet manager that lets you share code with other developers.
When compared to npm, Yarn is more secure and reliable. It is because codes in Yarn are generally shared through packages, which are also being called modules.
Steps to Install Yarn
Like Magento 2, there are many ways to install Yarn. But since we’re using Ubuntu as the operating system, we will be installing Yarn through the Debian package repository.
Execute the below command to configure the Debian repository:
curl -sS https://dl.yarnpkg.com/debian/pubkey.gpg | sudo apt-key add -echo "deb https://dl.yarnpkg.com/debian/ stable main" | sudo tee /etc/apt/sources.list.d/yarn.list
NOTE: If you’re using Ubuntu 16.04 or a below version, it is compulsory to configure the source code repository by using the command below.
sudo apt-get update && sudo apt-get install yarn
One more thing you need to remember is that Yarn may or may not be located in your path. Therefore, it is recommended to verify and add the path so that you can run it without any interruption.
Path Setup for Yarn
Add the following command to your profile, which can be in .bash_profile, .profile, .bashrc, etc.
export PATH="$PATH:/opt/yarn-[version]/bin"
Next, you need to test if Yarn is installed properly or not.
To test the Yarn installation, execute the following command:
yarn –version
If you face any error or issue during the installation of Yarn, we highly recommend looking into GitHub for possible solutions.
Step 4 – PWA Installation in Magento 2.3
We’ve now finally reached the main step of the process, which is the PWA installation.
Here, we will use the Venia storefront in PWA installation as it can run quite seamlessly on our configured Magento 2 backend.
However, we will have to first install the Venia PWA storefront.
Follow the below-mentioned steps to install the Venia PWA storefront in Magento 2.3.
Requirements for Setting Up Venia PWA Storefront
Please fulfill the following requirements to install the Venia PWA storefront.
- Yarn > Version 1.13.0
- NodeJs > Version 10.14.1
- Functioning Magento 2.3 Setup
Steps to Install Venia Storefront
- Clone PWA-Studio Repository
To install the Venia Storefront, you have to clone the PWA-Studio repository in Magento 2.3 development environment by executing the following command.
git clone https://github.com/magento-research/pwa-studio.git
2. Install Project Dependencies
Execute the following command in the Magento PWA root directory to install PWA project dependencies.
yarn install
3. Get SSL Certificate
Next, we need to generate a secure and trusted SSL certificate for our Venia storefront.
yarn buildpack create-custom-origin packages/venia-concept
4. Create & Update .env file in PWA
To create .env file, we need to execute create-env-file subcommand with the build CLI tool.
This subcommand will help to create packages/venia-concept/.env from which we can set value for MAGENTO_BACKEND_URL.
MAGENTO_BACKEND_URL="https://master-7rqtwti-mfwmkrjfqvbjk.us-4.magentosite.cloud/" yarn buildpack create-env-file packages/venia-concept
Step 5 – Start The Server
Build Artifacts
Use the command given below to generate build artifacts for the Venia storefront.
yarn run build
Run The Server
There are multiple ways to run the server. Below, we’ve shared 3 different command options to run the server.
yarn run watch:venia
The above command will start the Venia storefront development environment.
yarn run watch:all
The above command will run PWA developer experience along with hot-reloading and concurrent build pack rebuilds.
yarn run build && yarn run stage:venia
The above command will generate build artifacts and run the staging environment.
Step 6 – Setup Nginx Reverse Proxy
After the server is ready, it is critical to set up Nginx HTTPS reverse proxy for taking clients’ requests, pass them to different servers, and deliver server-level response to the clients.
location / {
proxy_pass http://127.0.0.1:8080; (Because we are using personally hosted web server)
proxy_http_version 1.1;
proxy_set_header Upgrade $http_upgrade;
proxy_set_header Connection 'upgrade';
proxy_set_header Host $host;
proxy_cache_bypass $http_upgrade;
}
Conclusion
So, there you have it! The complete step-by-step process to install PWA studio in Magento 2.3.
The process may seem difficult and lengthy at first but know that MageDelight Magento 2 PWA Solution is a one-time investment that has proven to yield positive results in the long run for any kind of eCommerce business.
So, we highly recommend transforming your existing Magento 2 store into a Magento PWA to gain a competitive advantage and grow your business in the coming years.
Recommended Read: How to Setup PWA in Magento 2.3?