

 (3 votes, average: 4.67 out of 5)
Today, we’re going to teach you guys how to set up and enable contact us form in Magento 2.
Now, when it comes to eCommerce websites, every business needs to build a unique store to stand out in the market and gain brand awareness.
However, there is one thing that every eCommerce store (including all Magento 2 stores) has in common – The contact Us Page.
A Contact Us Page, as you all might know, is an extremely important page of all types of websites, whether it’s a regular company website or an eCommerce store.
It allows your customers to reach you when they have certain doubts or questions.
So, in today’s post, we’re going to show you how to set up & enable the Contact Us form in your Magento 2 store.
Step-by-Step Process to Set Up and Enable Contact Us Form in Magento 2
Follow the below 5 steps to set up & enable contact us form in your Magento 2 store.
- Login to your admin panel and navigate to Stores>Configuration.
- Find the General tab and click on the Contacts.
- Select Yes in the Enable Contact Us field and scroll down to the Email Options.
- Write your contact email address in the Send Emails To field and name of the sender which will be set in emails in the Email Sender field.
- Click on the Save Config button to finish the process.
Step 1 :
Login to your admin panel and navigate to Stores>Configuration.
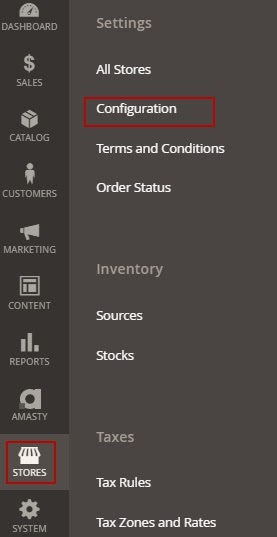
Step 2 :
After that, find the General tab and click on the Contacts as shown in the below screenshot.
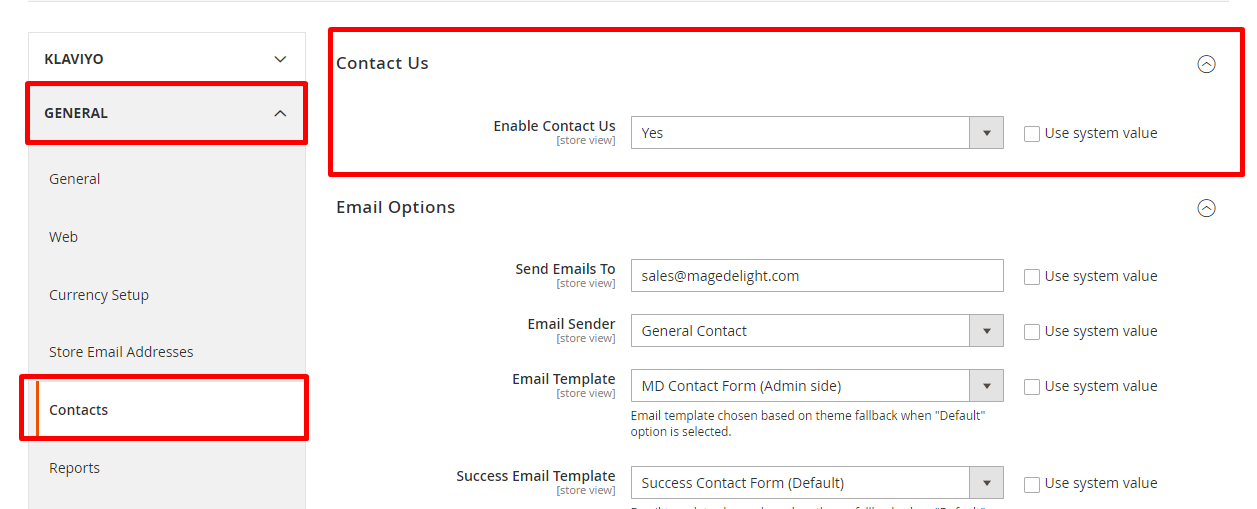
Step 3 :
Now, on the next screen, you will be able to see the Settings for Magento 2 Contact Us form.
Here, select Yes in the Enable Contact Us field and scroll down to the Email Options.

Step 4 :
Next, you need to write your contact email address in the Send Emails To field.
Then, write the name of the sender which will be set in emails in the Email Sender field.
You can also even select a template that you want to use for your email messages in the Email Template field.

Step 5 :
Lastly, click on the Save Config button to finish the process.
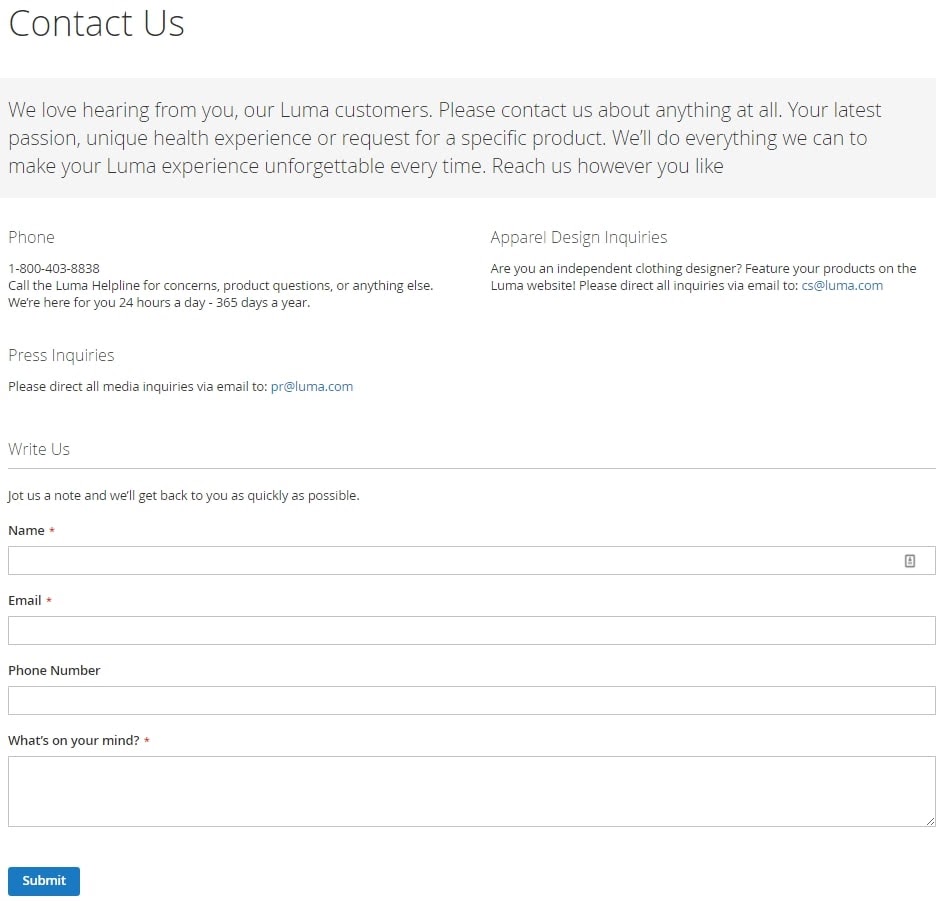
Now, check the output. It should look like the screenshot below.
“Also Read: How to Install and Configure Custom Form Builder to Magento 2?”
Conclusion
And there you have it! The step-by-step process to set up & enable contact us form in Magento 2.
You can also checkout our Magento 2 Custom Form Builder Extension if you want to create custom forms.
Check our Front and back-end demos to explore more exciting features of our Magento 2 Custom Form Builder Extension.
Also, you can refer this Magento 2 Custom Form Builder Extension’s FAQ Page for most common questions and it’s answers.
And if you need our professional assistance, feel free to contact us at any time.
