
 (2 votes, average: 5.00 out of 5)
A Magento 2 Custom Form Builder Extension helps the store owners build a customized form easily and without any hassle. In today’s tutorial, we will help you with a detailed guide for the configuration of our Custom Form Builder Magento 2 Extension.
Here are the steps to Install and Configure Custom Form Builder to Magento 2.
- Purchase Magento 2 Custom Form Builder Extension from MageDelight.
- Unzip the extension package file into the root folder of your Magento 2 installation.
- Configuration of the extension as mentioned in below.
Let’s learn each step in depth for the correct installation and configuration.
Step 1 : Purchase and Install the Magento 2 Custom Form Builder Extension
Once you purchase the extension, for installation you need to unzip the extension package file into the root folder of your Magento 2 installation. Now, connect to the SSH console of your server:
- Navigate to the root folder of your Magento 2 setup
- Run command as per below sequence,
php bin/magento setup:upgrade
php bin/magento setup:di:compile
php bin/magento setup:static-content:deploy
php bin/magento cache:clean
- log out from the backend and log in again!
Step 2 : Configure the Magento 2 Custom Form Builder Extension
Now, let us check the configuration of the extension:

Enable Module – Enable/Disable the module for your store
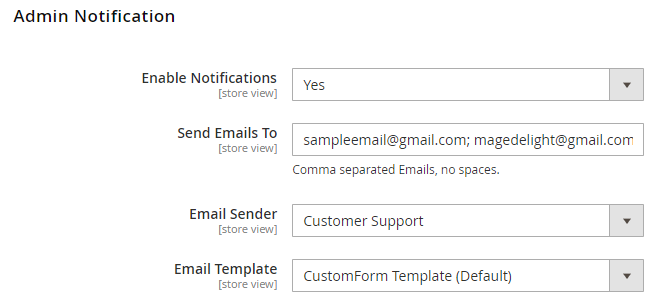
Enable Notifications – Select Yes/No to enable the email notifications
Send Emails to – Mention the email addresses separated by a comma to send a notification email to Admin
Email Sender – Set the email sender for admin notifications
Email Template – Set the email template as admin notification
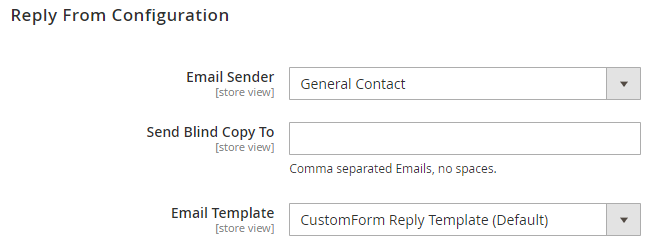
Email Sender – Configure the email sender to reply from.
Send Blind Copy to – Mention the comma-separated email address to send the blind copy
Email Template – Set the email template to be used to send a reply from the configuration
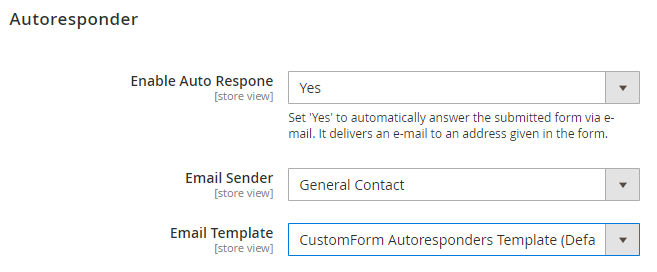
Enable Auto Response – Enable/Disable the autoresponder to the form
Email Sender – Select the email sender from which the auto-response to be sent
Email Template – Set the email template to be used for auto-response
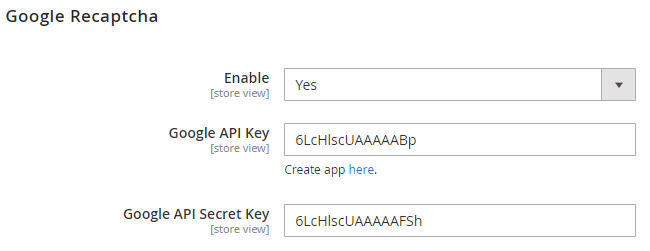
MageDelight Custom Form Builder Magento 2 Extension comes with built-in Google Recaptcha to protect your store from fraudulent form submissions.
Enable – Enable/Disable Google Recaptcha
Google API Key – Mention the API keys provided by Google ReCaptcha (developer account)
Google API Secret Key – Mention the API secret keys provided by Google ReCaptcha (developer account)
And you’re done.
Check our Front and back-end demos to explore more exciting features of our Magento 2 Custom Form Builder Extension.
Also, you can refer this Magento 2 Custom Form Builder Extension’s FAQ Page for most common questions and it’s answers.
We hope we’ve helped you well with the configuration process. Still, if you are stuck anywhere while configuration, our experts will be happy to help. Reach us out!
