



Key Takeaways:
Introduction
- Why do we need GA4 (Google Analytics 4) in Magento 2?
- Benefits of using GA4 + GTM.
- Why use MageDelight’s extension.
Two Setup Options
- Manual vs. Extension — recommend extension.
Prerequisites
- Have a Google account.
- Create GTM account & container.
- Create GA4 property & get Measurement ID.
Step-by-Step Guide
- Install extension & upgrade Magento.
- Backend configuration.
- Configure GTM & GA4 settings.
- Generate GTM tags & import JSON.
Verification
- Preview GTM tags firing.
- Check GA4 Realtime & DebugView.
Why Do We Need GA4 (Google Analytics 4) in Magento 2?
Google Analytics 4 (GA4) is the next generation of Google’s analytics platform, that provides deeper insights into customer behavior and eCommerce performance. For Magento 2 store owners, GA4 is more important than ever — here’s why:
Future-Proof Analytics
Universal Analytics (UA) was sunset in 2023, and GA4 is now the default and only supported platform. To continue tracking and analyzing your store’s data, GA4 integration is a must.
Understand Customer Journeys Better
GA4 allows you to track users across devices and sessions, so you can see how customers interact with your store — from browsing to checkout.
Enhanced eCommerce Insights
With GA4 you can track:
- Which products are viewed the most
- Add-to-cart and checkout behavior
- Which products drive the most revenue
- Conversion rates for different traffic sources
Event-Driven Data Collection
Unlike UA’s session-based model, GA4 is event-driven, so you can track detailed actions like clicks, scrolls, video plays, and more — giving you granular insight into user behavior.
Data-Driven Decision Making
With GA4 data, Magento 2 merchants can:
- Optimize product placement and promotions
- Improve user experience
- Identify and fix drop-off points in the purchase funnel
- Increase ROI through better targeting and personalization
In short, GA4 gives your Magento 2 store advanced analytics to make smarter, data-backed decisions and stay ahead in the game.
Benefits of Using GA4 + GTM in Magento 2
Integrating GA4 with GTM makes tracking smarter and simpler. GTM lets you manage all tags without touching Magento’s code, saving time and effort.
- Manage all tracking tags without editing Magento code
- Easily add, update, or remove tags anytime
- Track detailed events like clicks and conversions
- Improve data accuracy and reporting
- Test and debug tags before going live
- Save time and reduce development costs
Two Options: Manual vs. Extension
When it comes to integrating Google Analytics 4 (GA4) with Google Tag Manager (GTM) in your Magento 2 store, you have two choices:
- Manual: Create your GTM and GA4 accounts, add GTM code snippets to your Magento theme, and configure all tags, triggers and variables manually. You have full control but more technical knowledge and effort required.
- Extension-Based (Recommended): Use the MageDelight GA4 with GTM extension and the entire process is automated. The extension will install, configure and track events for you, saving time and reducing errors.
For most store owners we recommend the extension for a faster, easier and more reliable setup. If you prefer the manual way, read on.
1. Setting Up GA4 + GTM in Magento 2 (Manually)
Want to connect Google Analytics 4 (GA4) and Google Tag Manager (GTM) to your Magento 2 store without using an extension?
You can absolutely do it yourself — it just takes a little more technical know-how. Don’t worry though, this step-by-step guide will walk you through everything you need.
Heads up: This method involves working in your Magento backend and configuring GTM manually. If you’d prefer a faster, easier option, check out our one-click extension instead!
Step 1. Create Your GTM Account & Container
Head over to Google Tag Manager and log in.
Click Create Account, then:
- Enter an account name (e.g., Magento Store - GTM)
- Choose your country
- Select Web as the target platform
- Click Create, agree to the terms — and you’re all set! Your GTM container is now ready.
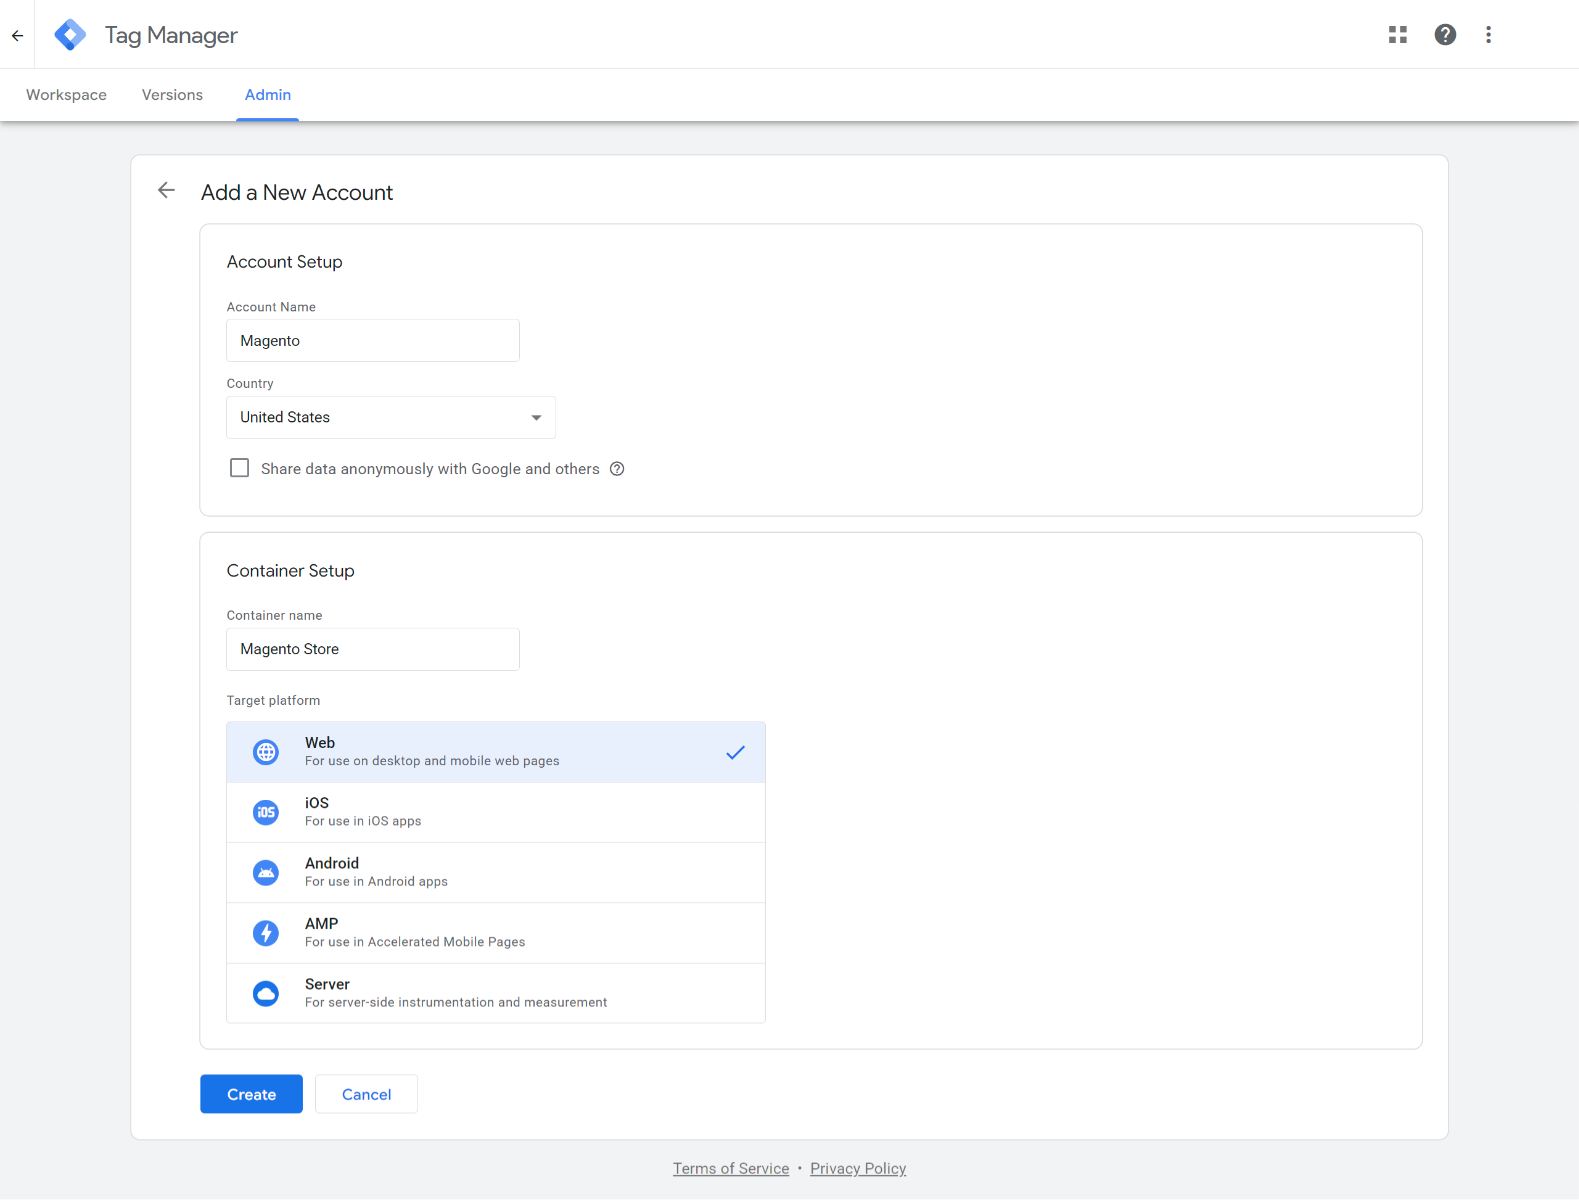
Ignore this step if you already have an account in GTM.
Step 2. Grab Your GTM Code Snippets
Once your container is created, GTM will display two code snippets:
- The <head> snippet (for JavaScript tracking)
- The <noscript> snippet (for users with JavaScript disabled)
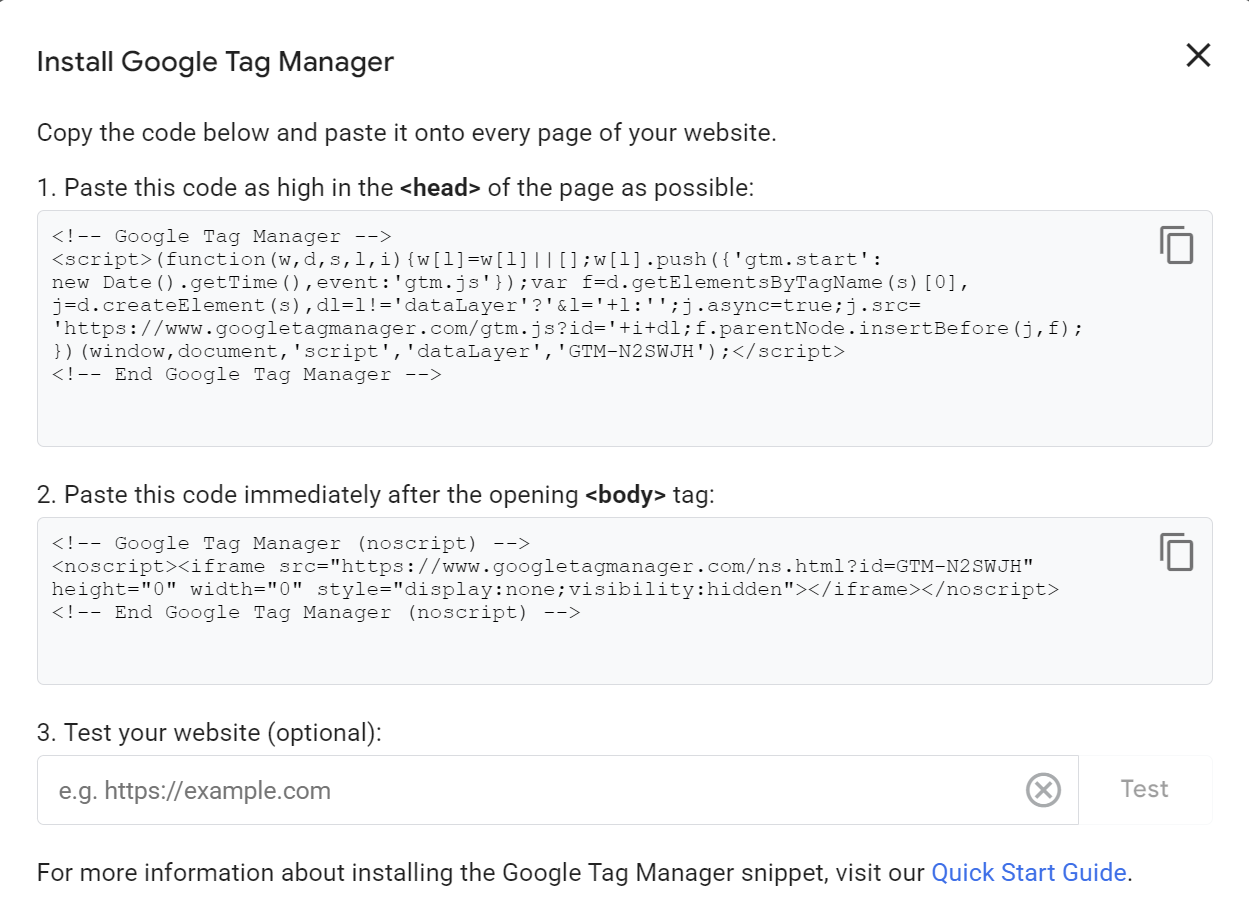
Pro tip: Keep this page open — you’ll need these snippets in the next step.
Step 3. Add GTM Code to Magento 2
Log in to your Magento Admin Panel.
Go to:
Content > Design > Configuration, then edit your active theme.
Paste the snippets as follows:
- Place the <head> snippet under HTML Head > Scripts and Style Sheets

- Place the <noscript> snippet under Footer > Miscellaneous HTML

Save your changes, then clear the Magento cache at System > Cache Management.
Step 4. Set Up GA4 in Google Analytics
Next, head to Google Analytics and log in.
Click the ⚙️ Admin button, then:
- Under Property, click Create Property and fill the details.
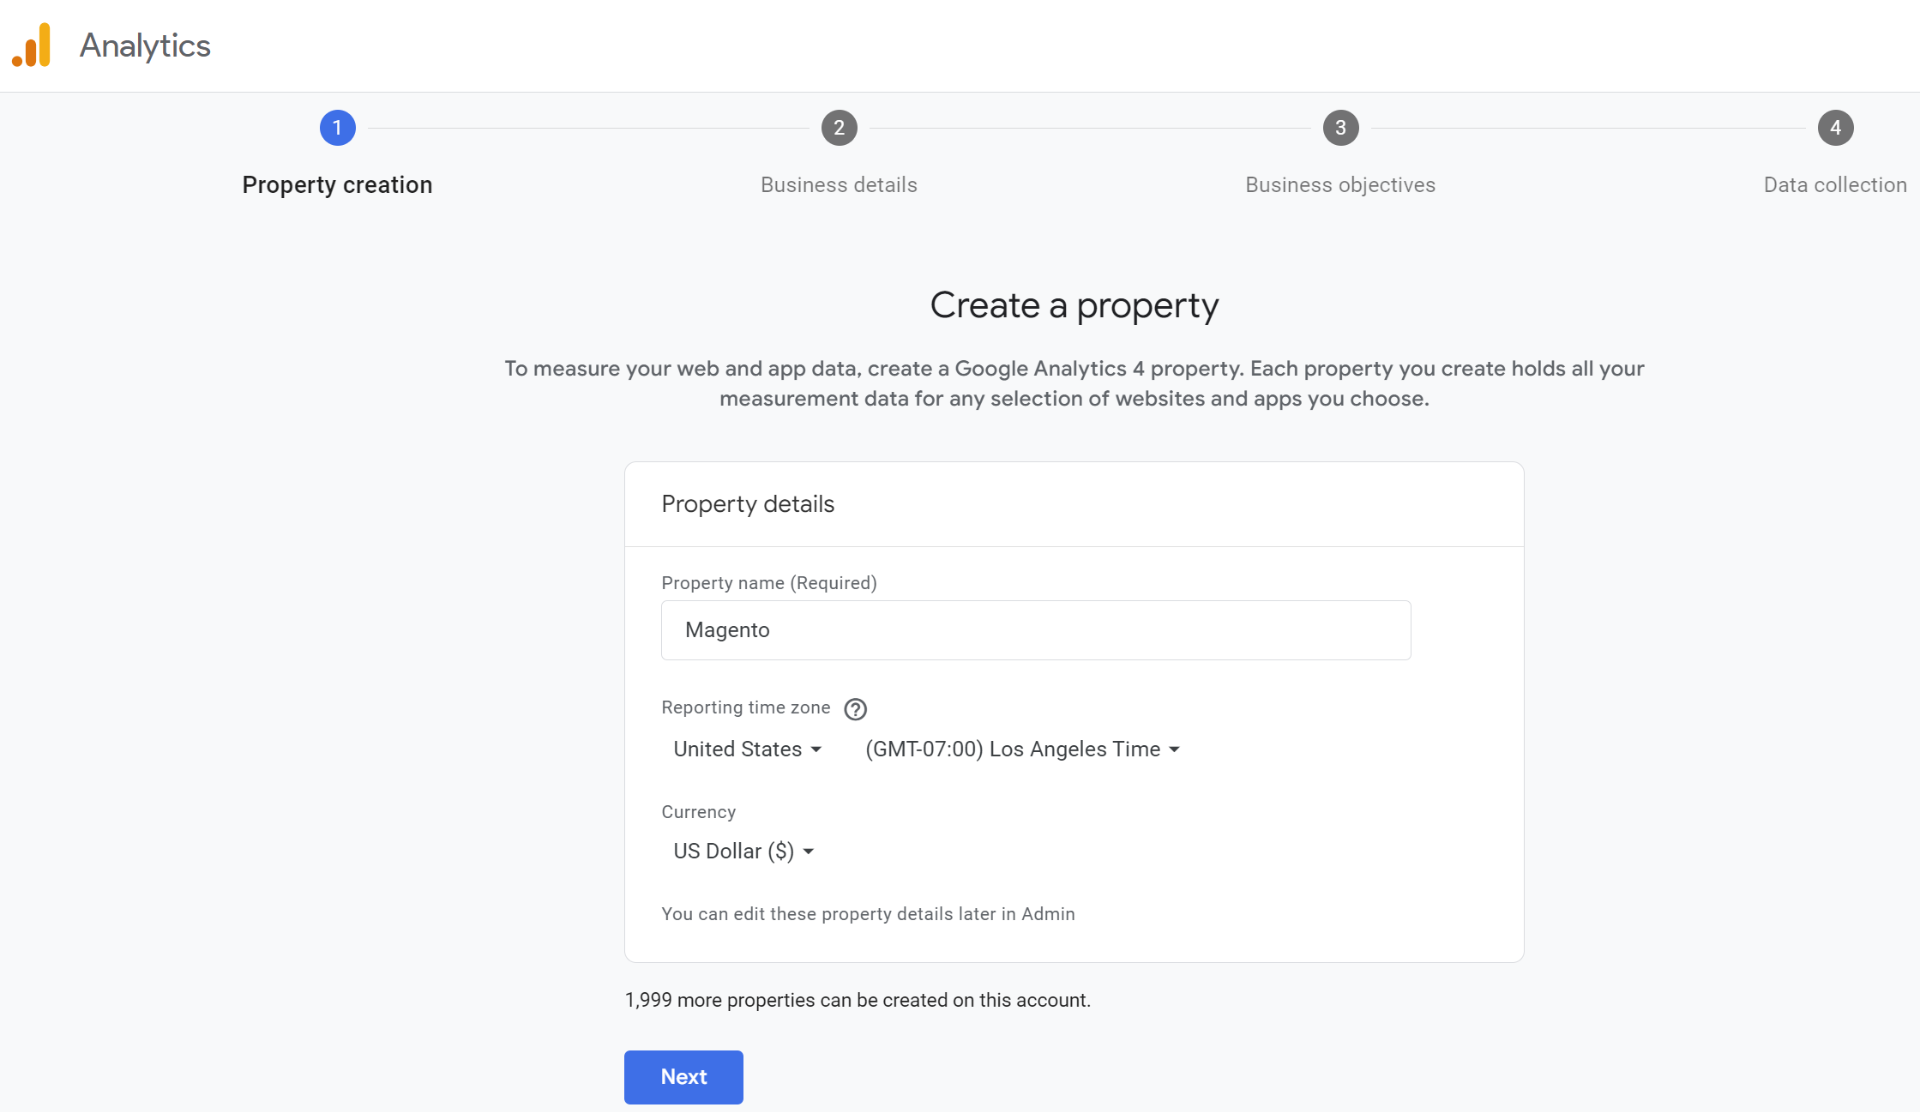
- Create a Web Data Stream, then copy your Measurement ID (it starts with G-).
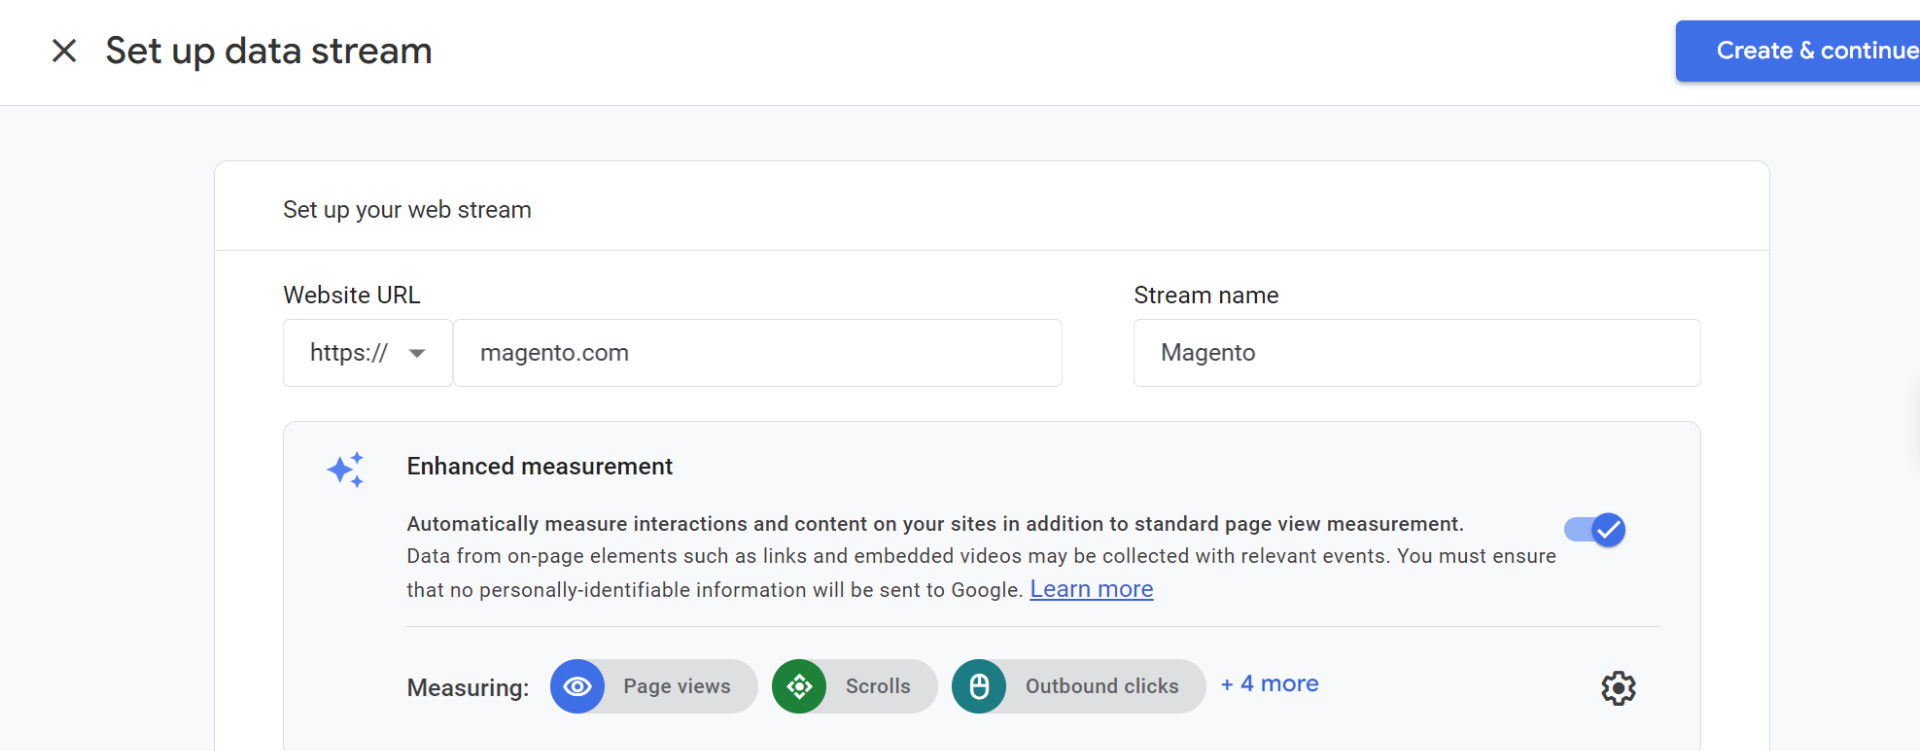
Step 5. Link GA4 to GTM
Now, go back to GTM and create your GA4 tag:
- Click Tags > New
- For tag type, select Google Analytics: GA4 Configuration
- Paste your Measurement ID from GA4
- Set the trigger to All Pages
- Save your tag and hit Submit to publish the container.

Done — GA4 is now connected to your store through GTM!
Step 6. Make Sure It’s Working
Here’s how to double-check everything is set up correctly:
Quick Check:
- Open your store in a browser and check the Realtime Report in GA4 — you should see active users.
Thorough Check:
- Use GTM’s Preview Mode to ensure tags are firing properly.
- Check GA4’s DebugView for detailed event data.
Troubleshooting Tips
- Didn’t publish your GTM container? Go back and click Submit.
- Not seeing data? Make sure ad blockers are turned off while testing.
- Still having trouble? Our support team is happy to help!
How to Setup Magento 2 GA4 (Google Analytics 4) with GTM Extension?
Follow below steps to Setup Magento 2 GA4 with GTM.
Step 1. Unzip the MageDelight's Magento 2 GA4 with GTM extension package file into the root folder of your Magento 2 installation.
Step 2. Connect to SSH console of your server:
Step 3. Navigate to the root folder of your Magento 2 setup
Step 4. Run the command as per the below sequence,
php bin/magento setup:upgrade

php bin/magento setup:di:compile

php bin/magento setup:static-content:deploy

php bin/magento cache:clean
- log out from the backend and log in again
If you are using Magento 2.3 or later then you do not need to activate a license. The extension will be activated with a silent activation mechanism and does not require activation keys to be entered manually.
Step 5. Do the following Backend Configuration (Admin side).

- Enable: Set "Yes" to enable the module/extension. It will enable GA4 tracking for your store.

- Client ID: Provide Client ID provided from Google Developer Console Apps.
- Client Secret: Provide Client Secret generate from Google Developer Console.
Read here => Generate Google Client ID and Client Secret
Step 5. Create Google Analytics Client ID and Client Secret.

- GTM Javascript Code: Provide GTM Javascript Code here with your unique GTM tracking ID.
- GTM Non-JS Code: Provide GTM Non-Javascript Code here with your unique GTM tracking ID.


- Account ID: Provide GTM Account ID.
- Container ID: Provide GTM Container ID.
- Measurement ID: Provide GTM Measurement ID.

- Product Identifier: Select Product Identifier as either SKU or ID to share with Google Analytics.
- SKU - Magento Product SKU will be shared with GA4 APIs
- ID - Magento Product ID will be shared with GA4 APIs
- Currency: Select currency as either Base Currency or Store Currency to share with Google Analytics.
- Base Currency: Magento Store's Base Currency will be shared with GA4 APIs
- Store Currency: Magento Store's Store Currency will be shared with GA4 APIs
- Example:
- Magento Store Base Currency is USD, and Store Currency is GBP. If your GA4 Panel shows USD currency, then select Base Currency, but if your GA4 Panel is configured to show data in GBP, then select Store Currency in MageDelight GA4 currency configurations. We assume that you have multi-currency enabled in Magento as USD and GBP (Store View).
- Enable Brand: Select "Yes" to enable the brand. It will share values as Brands with GA4 APIs.
- Brand Attribute: Provide Magento Attribute to share values with Google Analytics as Brands. I.e., Magento Product Attribute "brand" can be set as GA4 brand.
- Enable Product Variant: Select "Yes" to enable the product variants to be shared with GA4 APIs.
- Child vs Parent: If Child shared, then Child Products information will be shared with GA4 APIs else, Parent Products information will be shared with GA4 APIs. It will be helpful with Magento configurable products. I.e., Parent SKU "MT11" and child SKU "MT11-S-Blue" is set in Magento. For Parents, it will share MT11, but for child SKU, it will share "MT11-S-Blue" with GA4.

- Checkout Success Path: Please provide the webpage URL of checkout success. I.e., "checkout/onepage/success".
- Order Total Calculation: Provide the order total either as the value of Magento Subtotal or Magento Grand Total.
- Exclude Tax From Transaction: Select "Yes" if you want to exclude tax from the transaction amount.
- Exclude Shipping From Transaction: Select "Yes" if you want to exclude shipping from the transaction amount.
- Persistent data layer expiry time: Provide values in minutes to persist (cookie) data layer.
- Use Secure Cookies: Set "Yes" to share the cookie as a secure cookie. Your website must be with HTTPS to use secure cookies.
- Is Allow Not Logged In customer: Set "Yes" to allow secure cookies for not logged-in customers.
Step 6. Generate GTM Tags for different custom events.

- Provide "Public ID" (it can be found in your GTM account) to generate tags, triggers, and variables for GA4. It will be helpful to import the same to Google Analytics Panel.
Step 7. Import Container using a JSON file.
- In GTM Dashboard access the Admin section and choose Import Container.
- Click the Choose container file option and select the JSON file you previously prepared and downloaded.
- Then, select a workspace (existing or new) and an import option.
- When you import your container, you will be given the option of merging the imported content with the selected workspace or completely overwriting it. Overwriting the specified workspace will delete all of the workspace's current tags, triggers, and variables and replace them with the imported container.
- After importing the generated JSON, a preview will appear, informing you of the number of modifications made to the container. Tags, Triggers, and Variables should be added or altered in varying quantities based on your Magento Admin settings. After you click Confirm, you should be finished importing your preferences.
Also read: How to Add Google Analytics 4 (GA4) with GTM to Magento 2?
Realtime Tracking Logs
MageDelight >> GA4 with GTM >> Reports >> Realtime Tracking Logs

- Realtime Data in JSON format can be viewed in the admin panel.
Demo
Click here to visit frontend.
Click here to visit the backend admin panel.
Purchase
Buy Now => Magento 2 GA4 with GTM Extension from MageDelight.
FAQs
Refer this Magento 2 Google Analytics 4 (GA4) With GTM Support Extension’s FAQ Page for most common questions and it’s answers.
And if you need our professional assistance, feel free to contact us anytime.
