


 (8 votes, average: 2.50 out of 5)
Today, we’re going to teach you guys how to install Magento 2.4 on Windows 10.
Installing Magento 2.4 can be sometimes difficult as there are high chances of configuration-related errors. So, in order to help you avoid making such errors, we’ve decided to create a comprehensive tutorial on how to install Magento 2.4 on Windows 10.
This post will show you exactly how to install Magento 2.4 on Windows 10 successfully.
Pre-Requisites
Before starting Magento 2.4 installation process, you need to download the following setups:
- XAMPP (PHP ≥ 7.3)
- Composer
- Elasticsearch
- Magento Version 2.4.1 (without sample data)
Step-By-Step Process to Install Magento 2.4 on Windows 10
Please follow the below steps to learn how to install Magento 2.4 on a Windows 10 operating system.
Step – 1
Once you’ve downloaded the setups mentioned in the pre-requisite section, you need to install Composer and XAMPP on your Windows 10 system.
Step – 2
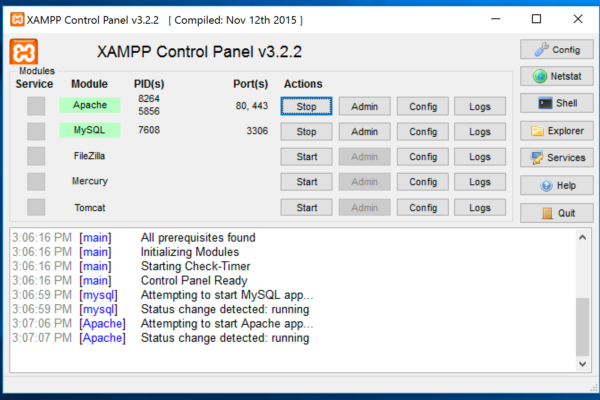
After that, launch Apache & MySQL from XAMPP Control Panel, as shown below.
Step – 3
Next, go to htdocs directory in the XAMPP installation folder. Then, create a new folder inside htdocs directory named “elasticsearch”, and paste the elasticsearch zip file into the new folder you just created.
Step – 4
Now, unzip the elasticsearch zip file, go to bin folder, and execute the “elasticsearch.bat” file by double-clicking on it to launch elasticsearch cluster.
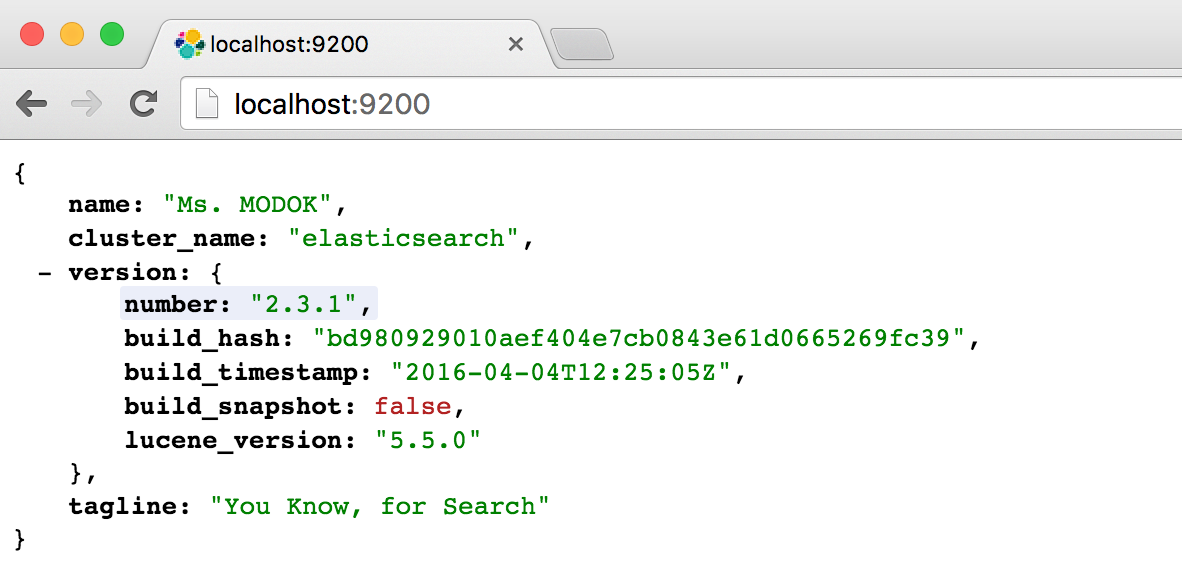
Note: Make sure the elasticsearch is up and can be accessed by visiting localhost:9200 on any web browser. And when you access it, you should be able to see JSON objects as shown in the screenshot below.
Step – 5
After that, navigate to localhost/phpmyadmin, and create a new database named “magento”.
Then, create a new folder named “magento” in the htdocs directory, paste the magento.zip file, and unzip it inside the new folder.
Step – 6
Next, go to vendor\magento\framework\Image\Adapter inside the new magento folder, and open G2d.php using any code editor tool.
Then, search for “validateURLScheme” method and replace the entire method code with the following:
private function validateURLScheme(string $filename) : bool

{

$allowed_schemes = ['ftp', 'ftps', 'http', 'https'];

$url = parse_url($filename);

if ($url && isset($url['scheme']) && !in_array($url['scheme'], $allowed_schemes) && !file_exists($filename))

{

return false;

}

return true;

}
Step – 7
Now, go to vendor\magento\framework\View\Element\Template\File in the new magento directory, open the validator.php file using any code editor tool, and replace line #138 with the following:
$realPath = str_replace('\\', '/',$this->fileDriver->getRealPath($path));
Step – 8
After that, go to vendor\magento\framework\Interception in the new magento folder, open PluginListGenerator.php file using any code editor tool, and replace the entire line #158 with the following:
$cacheId = implode(‘-’, $this->scopePriorityScheme) . “-” . $this->cacheId;
Step – 9
Next, go to xampp/php folder and php.ini file using any code editor tool.
Then, enable intl, soap, sockets, xsl extensions on lines #921, 943, 944, 949 by deleting the semicolon and restart the xampp.
Next, open the cmd program and execute the following commands inside the magento directory:
php bin/magento setup:install — base-url=”http://localhost/magento" — db-host=”localhost” — db-name=”magento" — db-user=”root” — db-password=”” — admin-firstname=”admin” — admin-lastname=”admin” — admin-email=”[email protected]” — admin-user=”admin” — admin-password=”admin123" — use-rewrites=”1" — backend-frontname=”admin”

php bin/magento setup:di:compile

php bin/magento indexer:reindex

php bin/magento setup:upgrade

php bin/magento setup:static-content:deploy –f

php bin/magento deploy:mode:set developer

php bin/magento cache:clean

php bin/magento cache:flush

php bin/magento module:disable Magento_Csp

php bin/magento module:disable Magento_TwoFactorAuth
Step – 10
Now, go to localhost/phpmyadmin, switch to ‘magento’ database, and execute the following sql query in the SQL Query tab:
INSERT INTO `core_config_data`(`path`, `value`) VALUES (‘dev/static/sign’, 0) ON DUPLICATE KEY UPDATE `value`=0
Step – 11
Next, access localhost/magento/admin in any web browser and log in with ‘admin’ as username & ‘admin123’ as password.
Once you’ve logged in successfully but the loader does not disappear and instead keeps loading, then you’ll have to make one last change.
Go to app/etc/di.xml in the magento directory, and search for:
Magento\Framework\App\View\Asset\MaterializationStrategy\Symlink

And replace it with:

Magento\Framework\App\View\Asset\MaterializationStrategy\Copy
Step – 12
Finally, refresh the page and you’ve successfully installed Magento 2.4 on your Windows 10 system.
Conclusion
And there you go! This is the complete process of installing Magento 2.4 on Windows 10. We hope that you found this tutorial helpful. In case you get stuck at any point and need our professional help with Magento 2 Development, please reach out to our experts at any time.
