
 (1 votes, average: 5.00 out of 5)
Today, we’re going to teach you guys how to create product parts finder in your Magento 2 store.
Product parts finder is an extremely useful feature, especially for automobile stores. It helps customers to easily find the right product part through make-model-year filter attributes.
This, in turn, drastically improves the customer experience and positively impacts the conversion rate of your store.
And in this post, we’re going to show you exactly how to create product parts finder in your Magento 2 store.
Step-by-Step Process to Create Product Parts Finder in Magento 2
In order to create product parts finder in your Magento 2 store, first, you need to get the Magento 2 Product Parts Finder Extension.
Once you’ve purchased & installed product parts finder extension, you need to configure it properly in your Magento 2 store.
We’ve already written a comprehensive, step-by-step guide on how to configure Magento 2 Product Parts Finder Extension for you to refer to.
After you’ve configured the product parts finder extension successfully in your Magento 2 store, you need to follow the below steps.
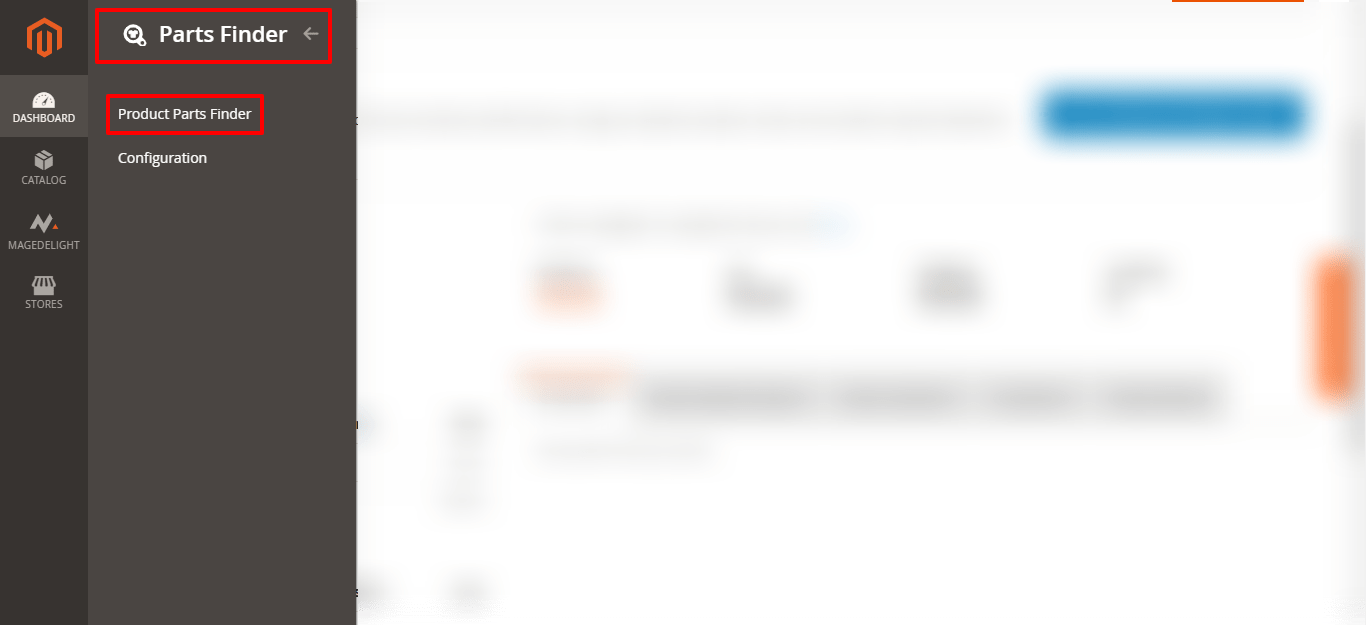
Step – 1
First of all, login to your admin panel and navigate to Stores > Parts Finder > Product Parts Finder.
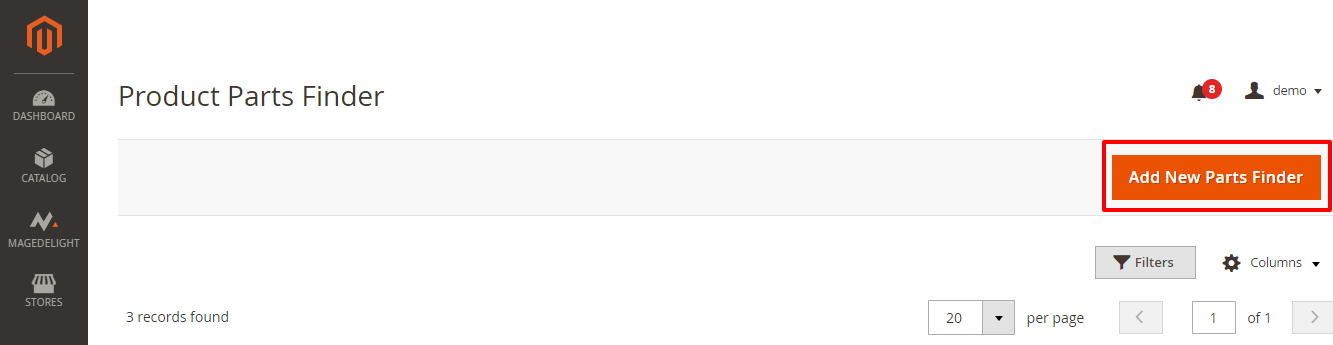
Step – 2
After that, click on the Add New Parts Finder button from the top-right corner.
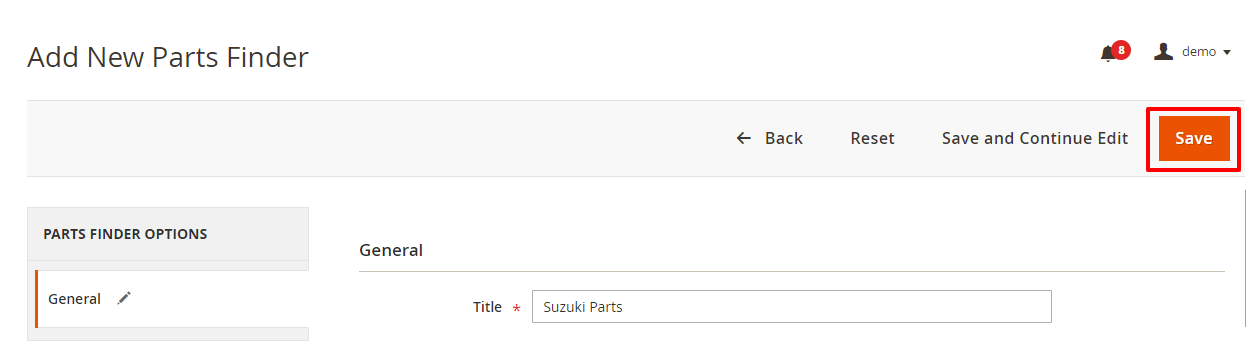
Step – 3
Next, fill in the following details under the General section as shown below:

- Write a title for your new product parts finder in the Title field.
- Write the number of dropdowns you need in the Dropdowns field.
- Select Horizontal in the Template field.
- Select Enabled in the Status field.
Step – 4
Now, click on the Save button from the top-right corner.
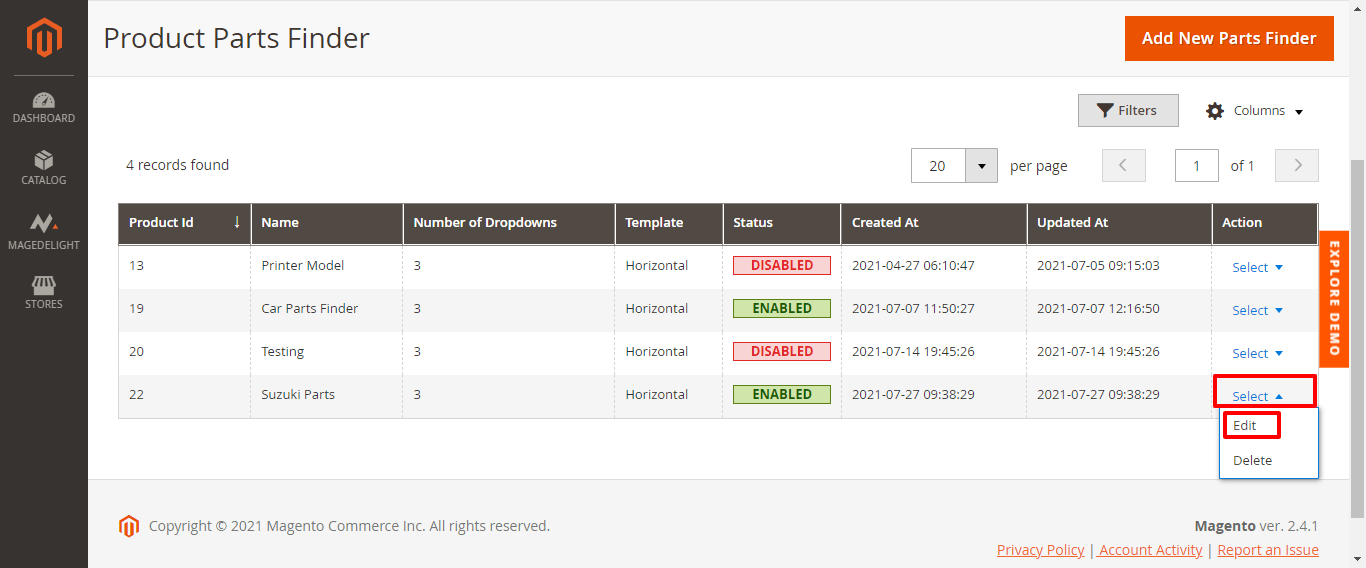
Step – 5
After that, click on the Edit button under the Select option in your newly created parts finder.
Step – 6
Next, open the General section and do the following:
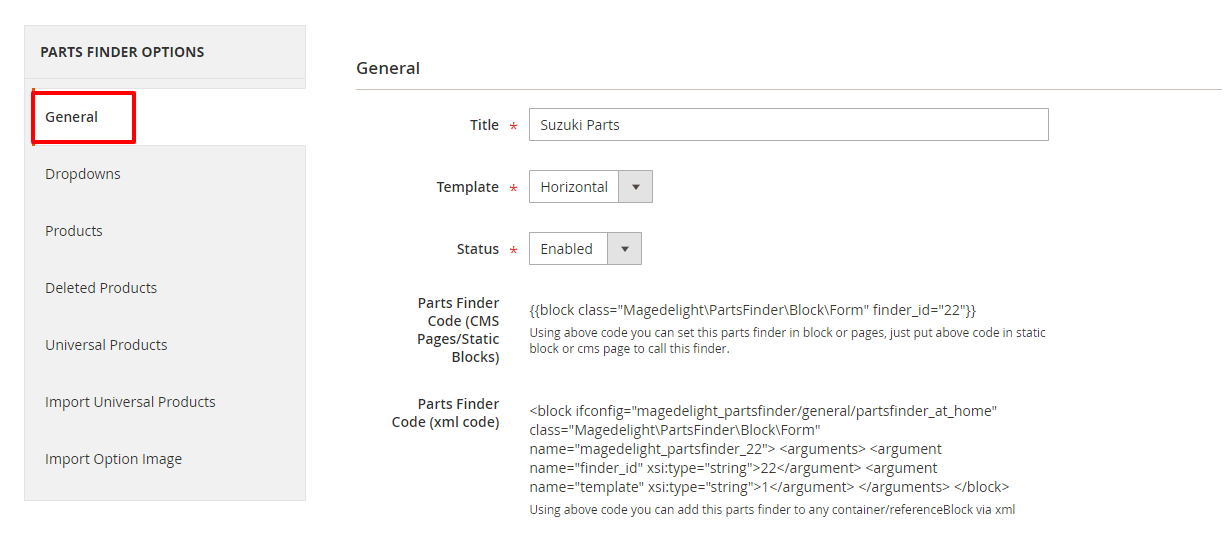
- Copy the code given in the Parts Finder Code (CMS Pages/Static Blocks) and paste it wherever you want to call this finder.
- Copy the code given in the Parts Finder Code (XML Code) and paste it in any container or reference block via XML.
Step – 7
Now, open the Dropdowns section and do the following:

- Write a name for the first dropdown in the Name field.
- Select Car Model in the Attribute field.
- Select Default in the Sort field.
- Select Image and Label in the Display Type field.
Now, repeat the above process for the remaining two dropdown options.
Step – 8
Finally, click on the Save button from the top-right corner to finish the process.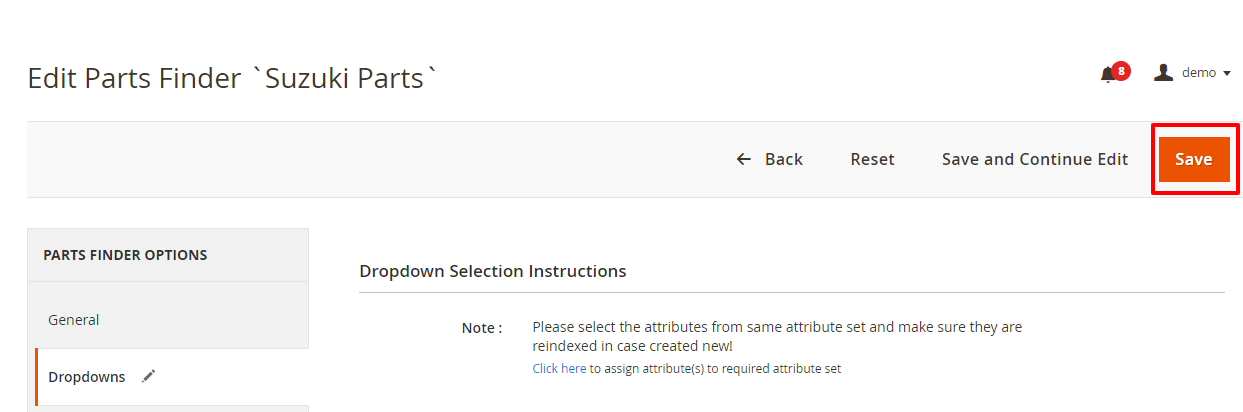
Conclusion
And that’s about it! This is how you can create a product parts finder in your Magento 2 store.
And if you need our professional assistance, feel free to contact us anytime.
