


 (3 votes, average: 3.67 out of 5)
Today, we’re going to teach you guys how to create a custom navigation menu in Magento 2.
The navigation menu in online stores places a key role in boosting customer funnel effectiveness.
But, according to recent research, only 16% of all eCommerce stores have sufficient filtering types, clear logic, & intuitive design.
So, we decided to teach as many Magento 2 store owners as possible how to create a custom navigation menu for maximum customer funnel effectiveness.
In this post, we’ve shown how to create a custom navigation menu using both methods (with & without extension).
How to Create a Custom Navigation Menu Without Extension in Magento 2
First of all, we will show you guys how to create a custom navigation menu without extension in Magento 2.
Magento 2 comes with an-built layered navigation that allows you to set filters by any product attribute such as price, category, etc.
Furthermore, the in-built layered navigation also comes with a total of 4 levels of nesting.
Level 1
The 1st level of Magento’s in-built layered navigation is the default category.
Level 2
The 2nd level is the main menu that is displayed to the store visitors. In the default Luma theme, the 2nd level generally includes categories such as Men, Women, Gear, Sales, Training, etc.
Level 3
The 3rd level is where you can split the main categories into several sub-categories. For example, Electronics categories can include Household Appliances, Smartphones, etc.
Level 4
The 4th level allows giving even narrower sections like Smartphones can be further segmented by brands.
Now, let’s check out the step-by-step process to configure in-built layered navigation in Magento 2.
Step – 1
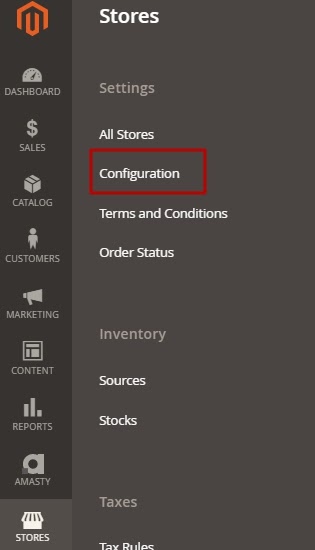
First of all, login to your admin panel and navigate to Stores > Settings > Configuration.
Step – 2
After that, go to the Catalog tab, select Catalog, and click on the Category Top Navigation section.
Step – 3
Next, find the Maximum Depth field and enter the number of subcategories that you would like to display in the top navigation.

Step – 4
Lastly, click on the Save Config button to finish the process.
How to Customize Price Navigation using in-built Layered Navigation in Magento 2?
Now, if you want to customize the price navigation, then the in-built layered navigation offers 3 different types of price navigation:
- Automatic (Equalize Product Counts)
- Automatic (Equalize Price Ranges)
- Manual
The first two automatic methods automatically calculate the navigation steps by product number or by price ranges.
The manual method, on the other hand, allows you to set the value of the navigation step of your own choice.
Here’s the step-by-step process to set any price navigation step via in-built layered navigation.
Step – 1
First of all, login to your admin panel and navigate to Stores > Settings > Configuration.

Step – 2
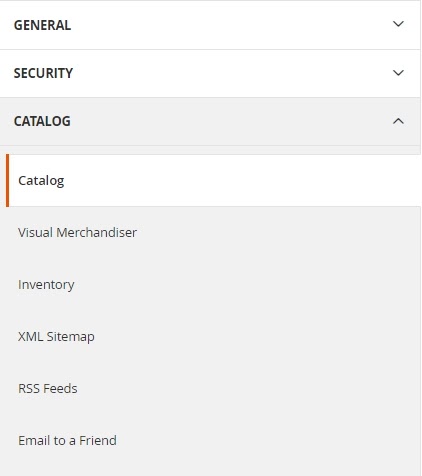
After that, expand the Catalog section and click on the Catalog option.

Step – 3
Next, open the Layered Navigation tab and select your preferred option.

Step – 4
Lastly, click on the Save Config button to complete the process.
Now, the in-built layered navigation feature in Magento 2 provides only a limited number of customization options such as basic filter customization or price navigation as we just learned above.
But what if you want more and advanced configurations in the layered navigation of your Magento 2 store?
Fortunately, there are many advanced Magento 2 Layered Navigation Extensions available in the market that you can integrate & provide advanced navigation features to your customers.
MageDelight Magento 2 Layered Navigation Extension, for example, is a vastly popular & feature-rich extension that allows store owners to make incredible customizations to their store navigation.
Below, we’ve shown how to create a custom navigation menu with an extension to provide more & advanced navigation features.
How to Create a Custom Navigation Menu With Extension in Magento 2
In order to create a custom navigation menu with more & advanced navigation features, first, you need to get the Magento 2 Layered Navigation Extension.
Once you’ve purchased & installed the layered navigation extension in your Magento 2 store, you need to follow the below steps to properly configure it.
Step – 1
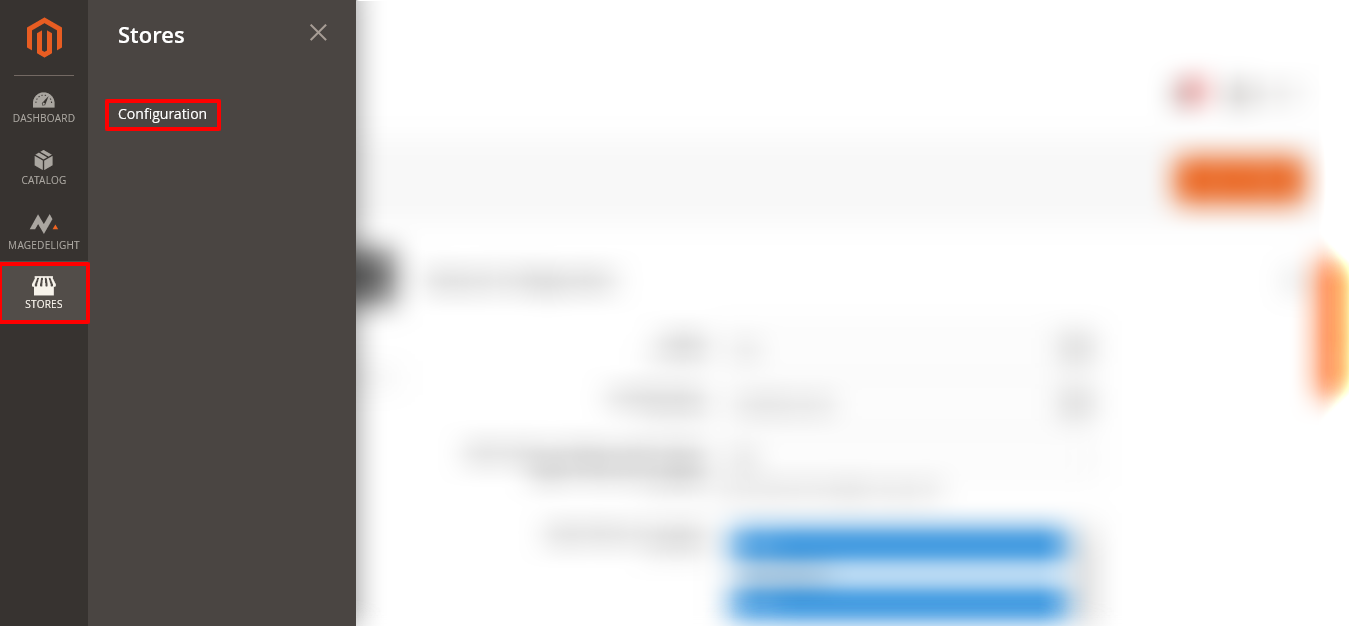
First, log in to your admin panel and navigate to Stores > Layered Navigation > Configuration.
Step – 2
After that, expand the General Configuration section and do the following:
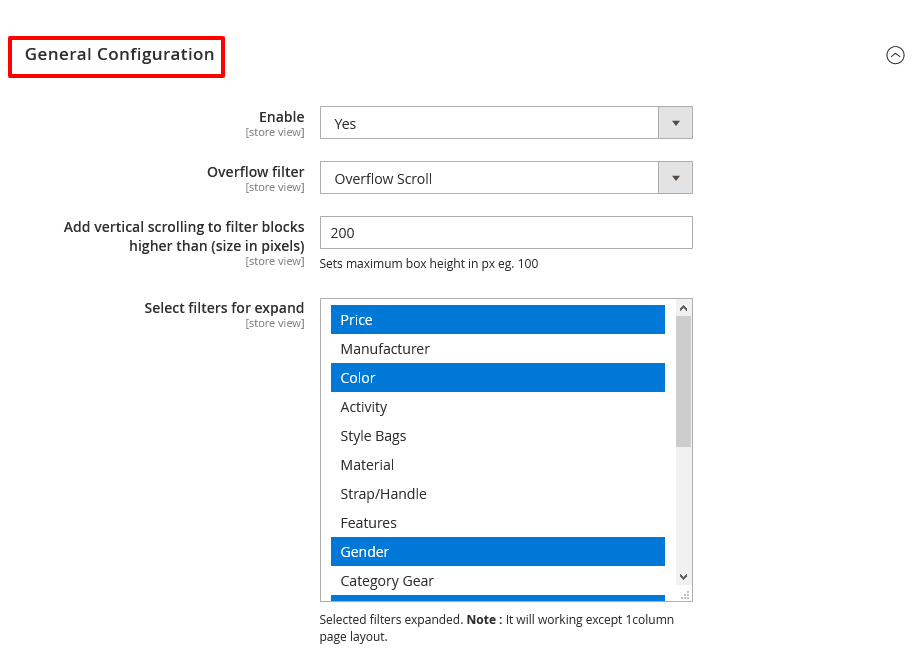
- Select YES in the Enable field.
- Select Overflow Scroll in the Overflow Filter field.
- Select filters that you want in the Select Filters for Expand field.
Step – 3
Next, expand the Category Filter section and do the following:

- Select Tree in the Show As field.
- Select YES in the Tree View Default Expanded field.
- Select “1” in the Tree Depth field.
- Select NO in the Allow Multiple field.
- Select Default in the Index Page With Applied Filter field.
- Select Default in the Follow Links With Applied Filter field.
- Select YES in the Add rel=”nofollow” to Layered Navigation Filter Links field.
- Select YES in the Expand field.
- Select Name in the Render Category By field.
- Select Ascending in the Category Sort By field.
- Select Show Labels Only in the Category Display Mode field.
Step – 4
Now, expand the Category Meta Tags section and do the following:
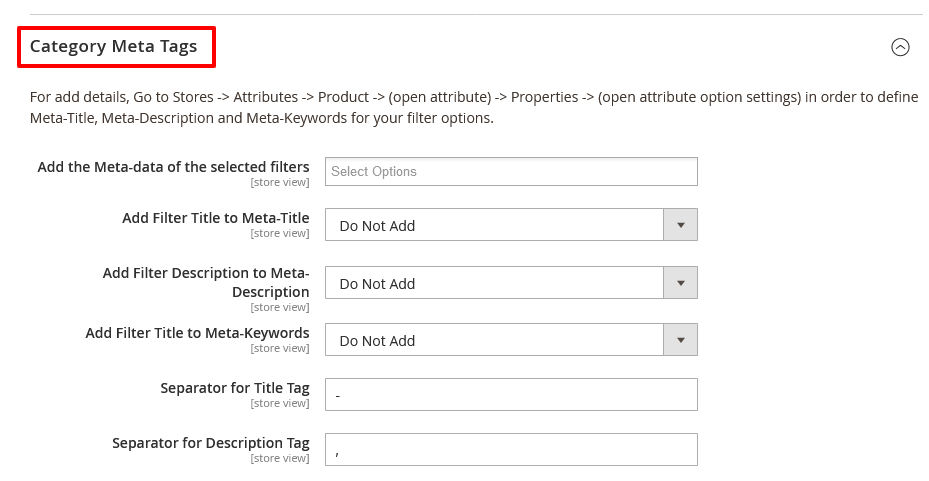
- Select Do Not Add in the Add Filter Title to Meta-Title field.
- Select Do Not Add in the Add Filter Description to Meta-Description field.
- Select Do Not Add in the Add Filter Title to Meta-Keywords field.
- Write “-” in the Separator for Title Tag field.
- Write “,” in the Separator for Description Tag field.
Step – 5
After that, expand the Category Title and Description section and do the following:
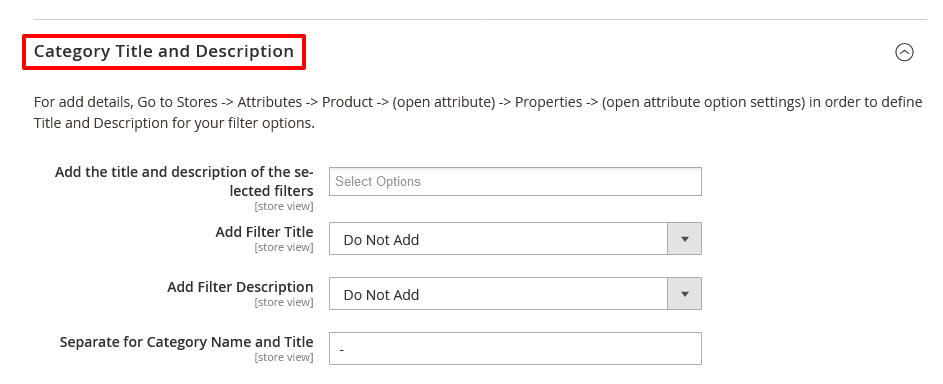
- Select Do Not Add in the Add Filter Title field.
- Select Do Not Add in the Add Filter Description field.
- Write “-” in the Separate for Category Name and Title field.
Step – 6
Next, expand the Stock Filter section and do the following:

- Select No in the Enabled field if you don’t want to enable stock filter & select Yes if you want to enable the stock filter feature.
Note: This feature will only work if you’re displaying out-of-stock products in your Magento 2 store.
Step – 7
Now, expand the Rating Filter section and do the following:

- Select NO in the Enabled field if you don’t want to show the rating filter & select YES if you want to display the rating filter in your Magento 2 store.
Step – 8
After that, expand the New Filter section and do the following:

- Select NO in the Enabled field if you don’t want to create a new custom filter & select YES if you want to create a new custom filter.
Step – 9
Next, expand the Sale Filter section and do the following:

- Select NO in the Enabled field if you don’t want to enable the sale filter feature & select YES if you want to enable the sale filter feature.
Step – 10
Now, expand the SEO Friendly URLs section and do the following:

- Select NO in the Enable field.
- Write “-” in the Filter Option Separator field.
- Select NO in the Add Attribute Name field.
Step – 11
After that, expand the Robots Meta Tag Configuration section and do the following:

- Select NO in the Allow Robots Meta Tag Modification field.
- Select NO in the Add rel=”nofollow” to Filter Links Automatically When Required field.
Step – 12
Now, expand the Canonical URL Configuration section and do the following:
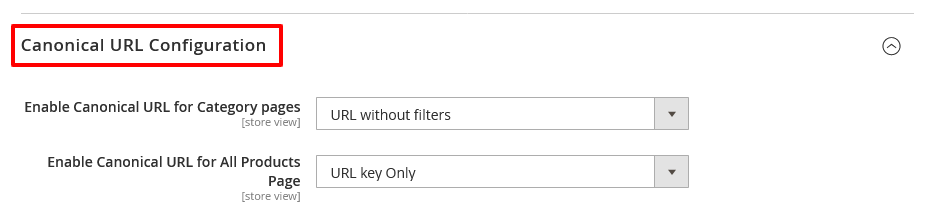
- Select URL Without Filters in the Enable Canonical URL for Category Pages field.
- Select URL Key Only in the Enable Canonical URL for All Products Page field.
Step – 13
Next, expand the Previous/Next Tag section and do the following:

- Select NO in the Add Prev/Next Tags On Layered Navigation Pages field.
Conclusion
And that’s about it!
This is how you can create a custom navigation menu without extension as well as with Magento 2 Layered Navigation Extension in your Magento 2 store.
And if you need our professional assistance, feel free to contact us at any time.