
 (1 votes, average: 5.00 out of 5)
Payments experience is a very important aspect for a smooth overall shopping experience on an eCommerce store. Stripe is a payment gateway that not only offers safe and secure payments but also improvises the payment experience in the store.
If you are an eCommerce store owner and looking to ease the payments, integrating Stripe into your store should be on the top of your priority list. Well, MageDelight’s Magento 2 Stripe Extension can be one of the best extensions to choose, for the same. To ease the integration process, we’ve brought step by step installation and configuration process of our extension.
- Unzip the extension package file into the root folder of your Magento 2 installation.
- Connect to SSH console of your server:
- Navigate to the root folder of your Magento 2 setup
- Run command as per below sequence,php bin/magento setup:upgradephp bin/magento setup:di:compilephp bin/magento setup:static-content:deploy
php bin/magento cache:clean
- log out from the backend and log in again
Backend Configuration
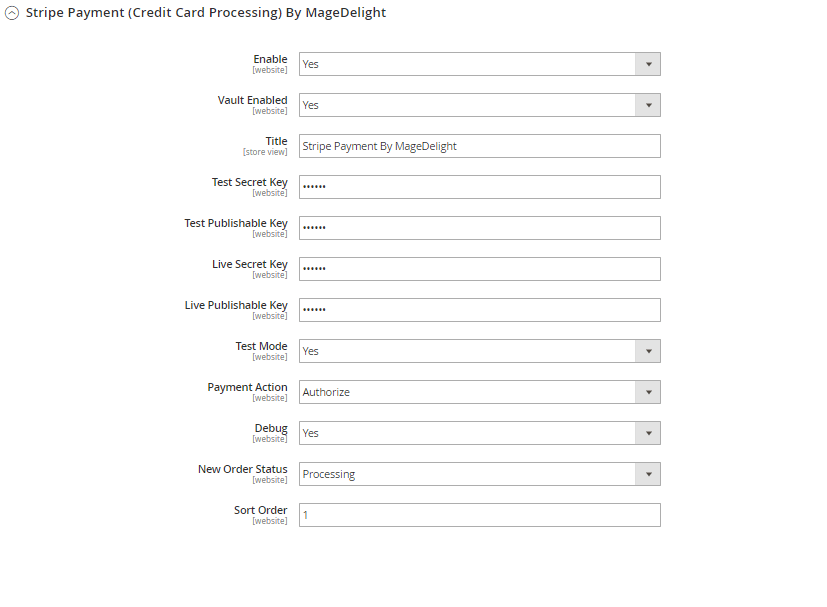
- Enabled: This can enable/disable the Stripe Payment method.
- Vault Enable: This can enable / disable Default Magento Vault
- Title: Here you can define the label for the Stripe Payment method that will display in
- Payment section of one page checkout.
- Payment information of order, invoice, credit memo, and shipment section.
- Test Secret Key : If test mode is enable for development/test, define test secret key here.
- Test Public Key: If test mode is enable for development/test, define test public key here.
- Live Secret Key: Set real account secret key here, while web-shop is on live mode.
- Live Public Key: Set real account secret key here, while web-shop is on live mode.
- Test Mode: Admin can define the mode of Stripe Payment method of web shop. Merchant can set either “Yes”/ “No” for this option depending on the environment of web shop (Production or Development).
- Payment Action: Admin can define the payment action that would take on successful order placed by user. Admin can choose,
- Authorize and Capture: This payment action will directly capture the requested amount from the customer’s credit card on placing an order from the frontend or backend. An invoice will automatically create when a user successfully places an order.
- Authorize Only: This payment action will only authorize the requested amount on the credit card of the customer on placing an order from the frontend or backend.
In this payment, an action invoice will not be created after the order is created successfully. Admin will have to manually create invoices from the backend from the order management section.
- Debug: This option defines the debugging mode of Stripe payment method. Admin can choose “Yes / No” depending on the Production / Development environment if web site. Normally this option should only enabled for development environment.
- New Order Status: his option defines the order status after successful processing the order.
-
Sort Order: This option defined the sort order of payment method on the payment step on checkout one page of frontend.
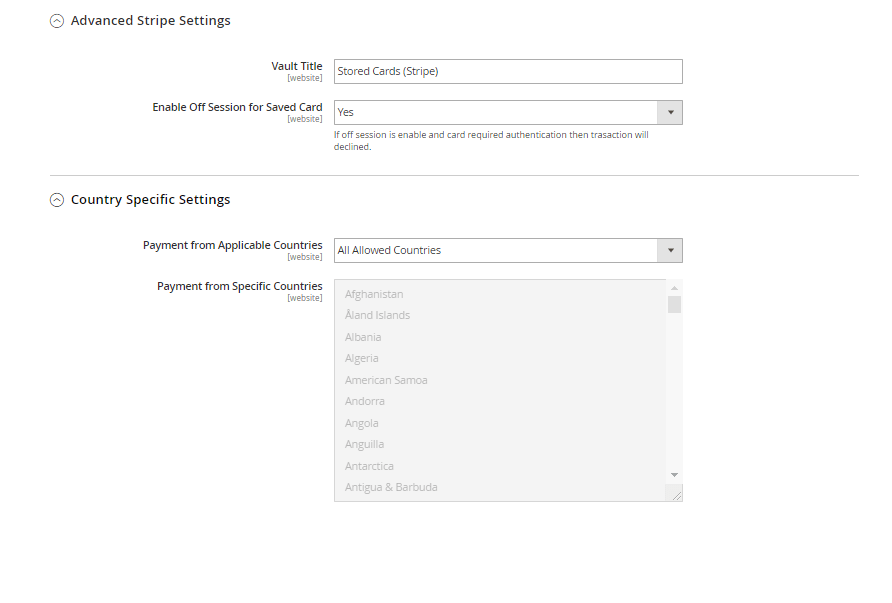
- Vault Title : Here you can define the label for the Vault Title
- Enable Off Session For Saved Card : Set off session to “Yes” to indicate that the customer is not in your checkout flow during this payment attempt. This causes the Payment Intent to throw an error if authentication is required.
- Payment from Applicable Countries: You can allow all countries or specific county to capture payment from using Stripe Payment Gateway
- Payment from Specific Countries: Select countries you want to allow for Stripe Payment Gateway
And if you need our professional assistance, feel free to contact us anytime.
