
 (4 votes, average: 5.00 out of 5)
Today, we’re going to teach you guys how to configure the store locator feature in Magento 2.
Because of high shipping costs and long delivery wait periods, adding a store locator feature is extremely important in eCommerce stores.
It allows customers to easily locate your physical store nearest to them and purchase their desired items by providing accurate directions to your store.
This, in turn, helps to increase foot traffic in physical stores and boosts the average sales.
With that being said, let’s look at the step-by-step process to configure the store locator feature in Magento 2 store. Step-by-Step Process to Configure Store Locator in Magento 2
In order to configure the store locator feature in your Magento 2 store, you need to get the MageDelight Store Locator Magento 2 Extension.
This locator dealer extension allows not only easily integrate the store locator feature, but it also helps store owners to efficiently manage the store locator information on their Magento 2 store.
Here are the steps you need to follow after downloading Magento 2 Store Locator Extension.
Step 1
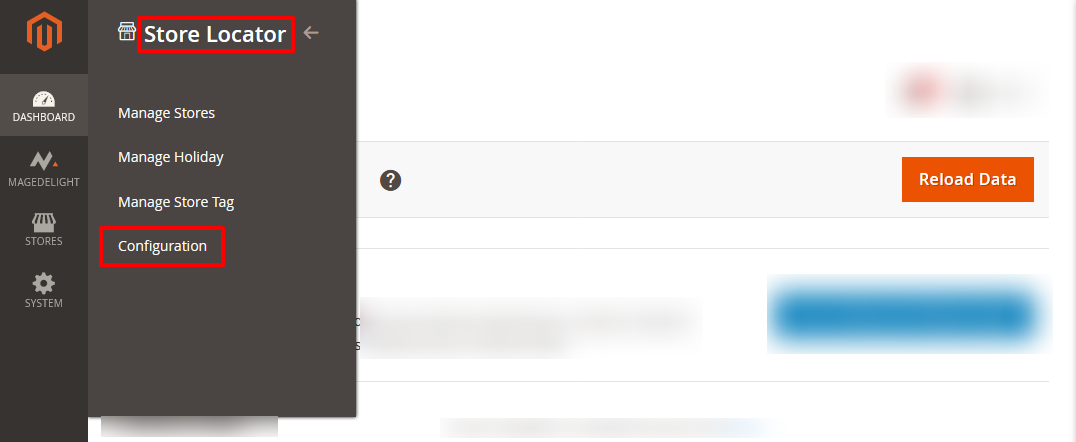
First of all, login to your admin panel and navigate to Stores > Store Locator > Configuration.
Step 2
After that, Go to the General tab and do the following:
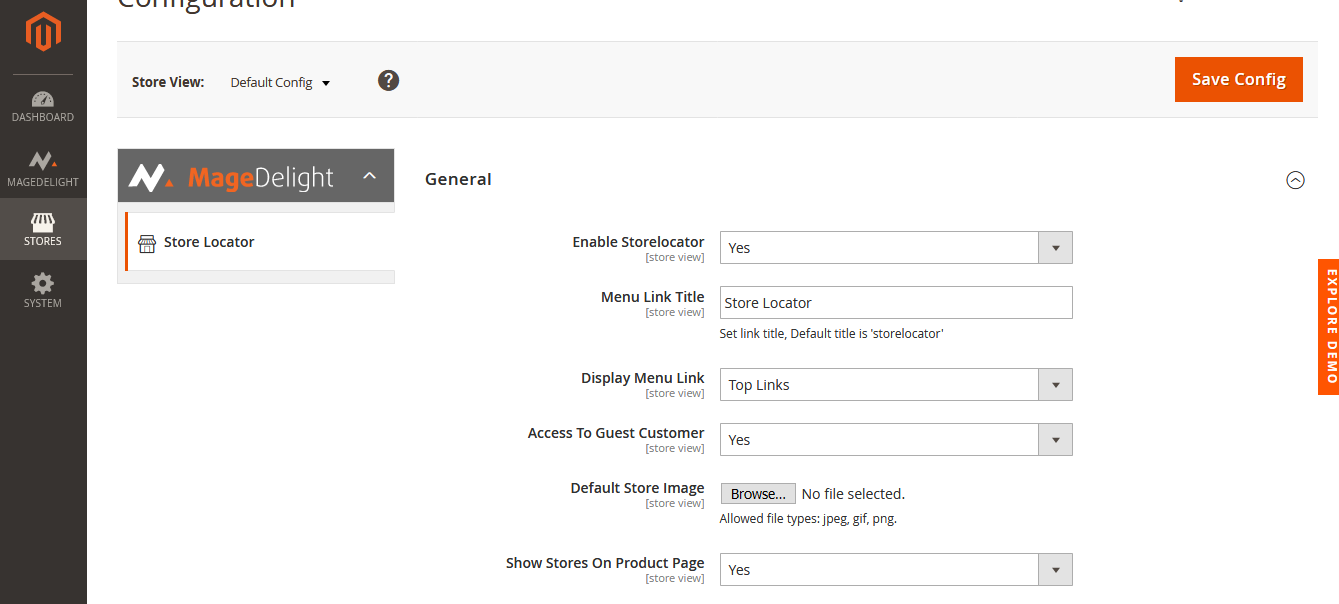
- Select Yes in the Enable Storelocator field.
- Write a name in the Menu Link Title field.
- Select your preferred option in the Display Menu Link field.
- Select Yes in the Access to Guest Customer field.
- Click on the Browse button to select a store image in the Default Store Image field.
- Select Yes in the Show Stores on the Product Page field.
Step 3
Now, scroll down to the Google Map tab and do the following:
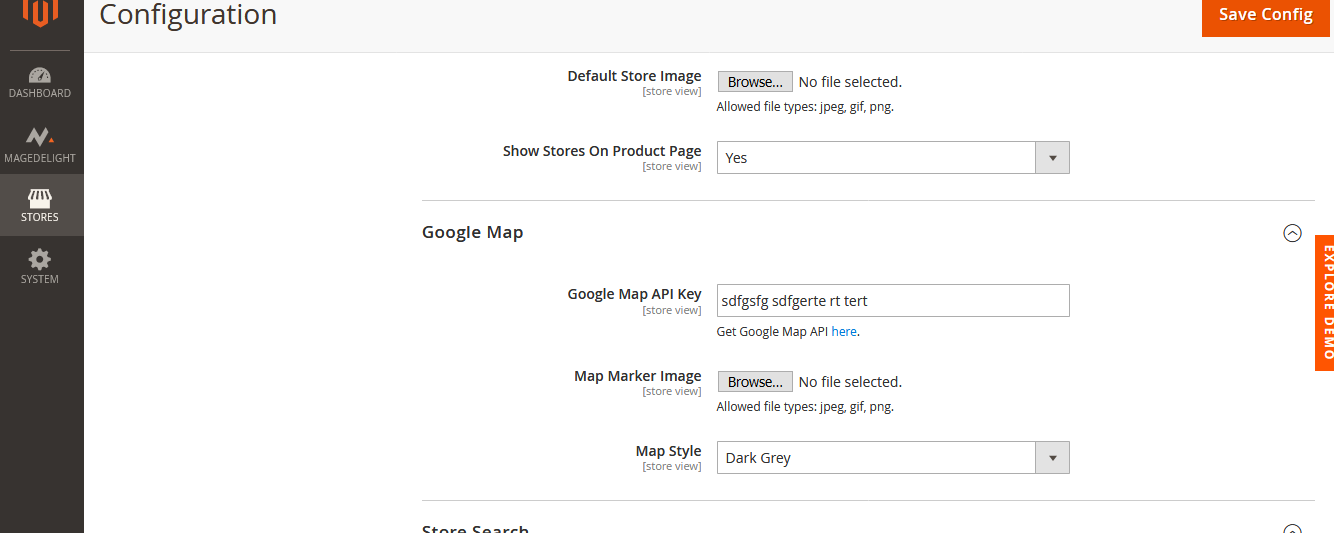
- Create a Google Account, open Google Maps Settings, and generate a Google Map API Key.
- Copy your Google Map API Key and paste it in the Google Map API Key field.
- In the Map Marker Image field, you can click on the Browse button to choose an image.
- Select your preferred style in the Map Style dropdown field.
Step 4
Next, scroll down to the Store Search tab and do the following:
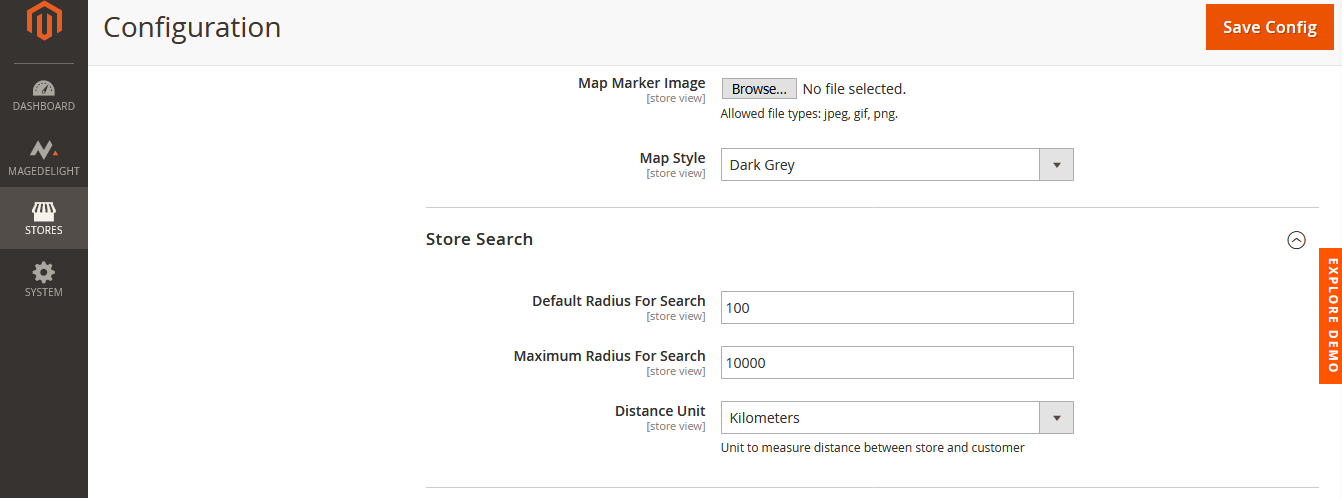
- Write a numeric value in the Default Radius For Search field.
- Write a numeric value in the Maximum Radius for Search field.
- Select a Unit such as Miles, Kilometers, etc. in the Distance Unit field.
Step 5
Finally, scroll down to the Store List View tab and do the following:
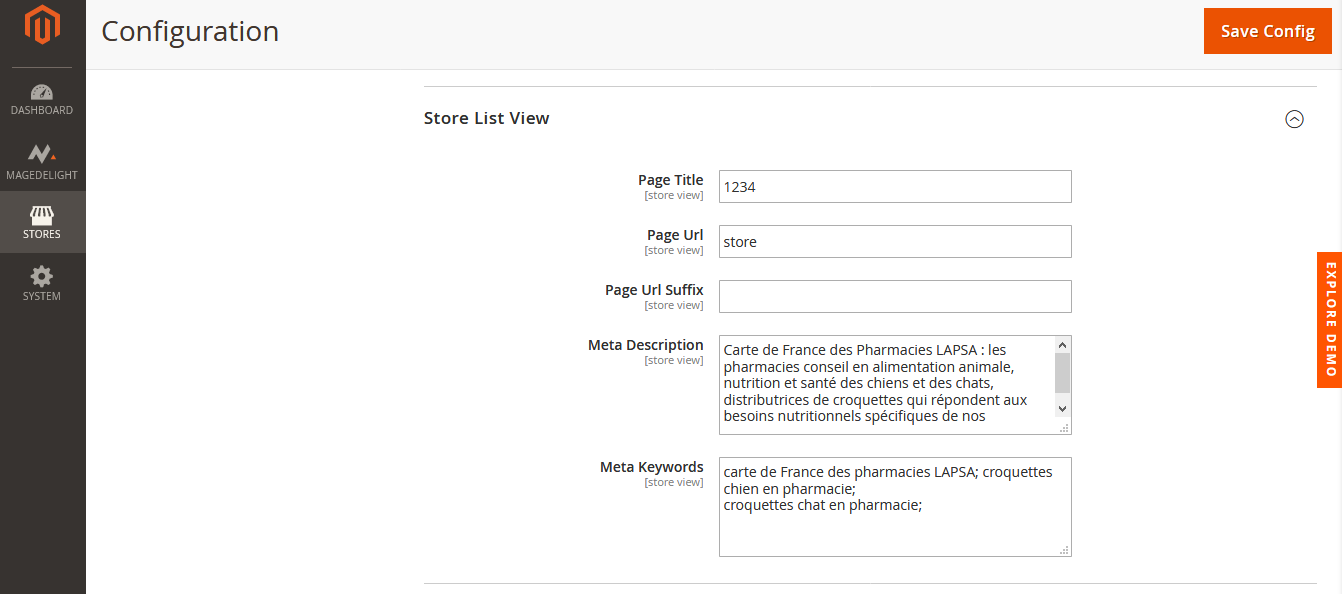
- Write a title in the Page Title field.
- Enter a URL in the Page URL field.
- Write a text in the Meta Description field.
- Write your target keywords in the Meta Keywords field.
Once everything is done, click on the Save Config button from the top-right corner to finish the process.
Final Words…
That’s it! – This is the easiest, step-by-step process to configure the store locator in Magento 2.
We hope that you found this tutorial helpful. If you have any queries, please ask them in the comments below.
And if you need our professional assistance, feel free to contact us anytime.
Recommended: Magento 2 Store Locator & Pickup Extension for Combo Functionality of Pickup & Locator!