
 (2 votes, average: 5.00 out of 5)
Today, we’re going to teach you guys how to configure store credit in Magento 2.
Store Credit is basically known as a special currency of a particular store that its customers can use for either purchasing or refunding within the store.
Unlike temporary sales or promotions, store credit does not expire and can be used any time in the future.
In addition, the store credit system also allows customers to overview their current balance as well as check the history.
And most importantly, offering store credits has also proven to help store owners build customer loyalty, enhance customer retention rate, and encourages customers to spend more.
Simply put, integrating the store credit feature is highly recommended for all eCommerce stores. And if your eCommerce store is based on Magento 2 platform, then you can easily integrate the store credit feature with the MageDelight Store Credit Extension.
In this post, we’re going to show you how to configure store credit extension in your Magento 2 store.
Step-by-Step Process to Configure Store Credit Extension in Magento 2
In order to implement the store credit feature in your Magento 2 store, first, you need to get the Magento 2 Store Credit Extension.
Once you’ve purchased & installed the store credit extension in your Magento 2 store, you need to configure it properly as shown below.
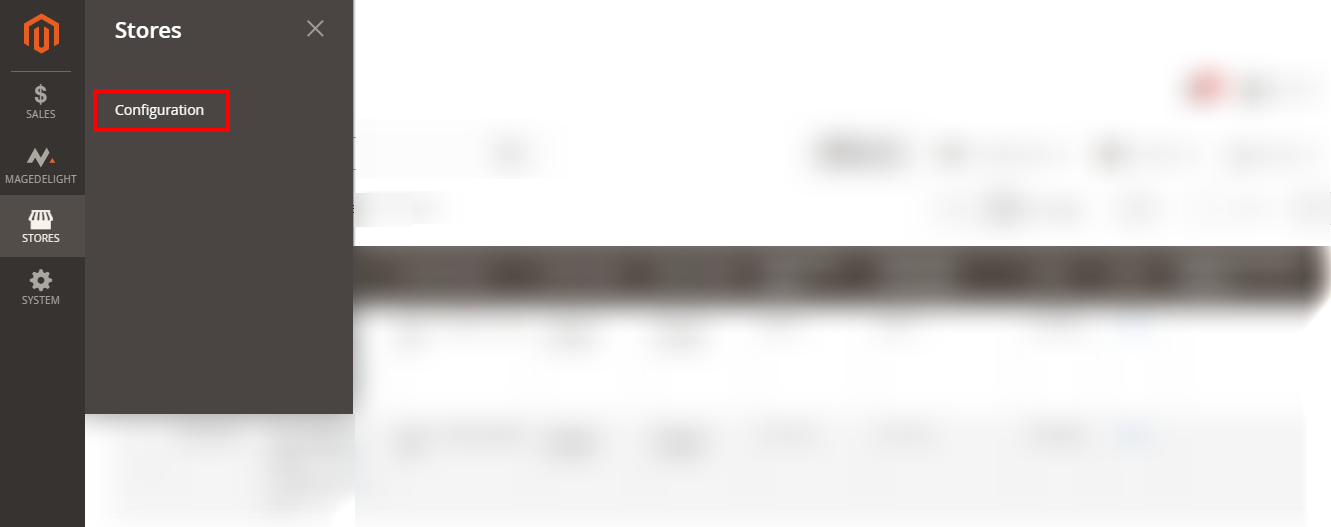
Step – 1
First of all, login to your admin panel and navigate to System > Store Credit > Settings.
Step – 2
After that, expand the License Configuration section and do the following:
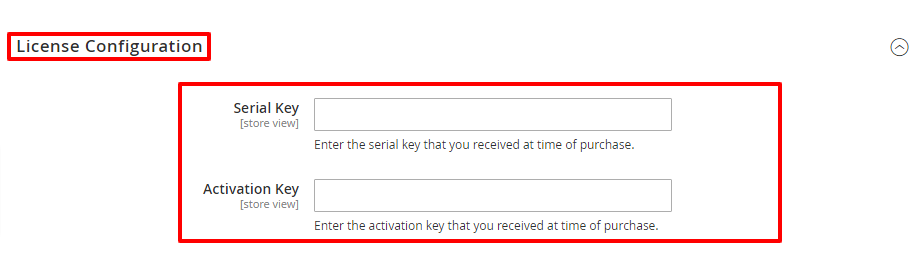
- Enter the serial key that you have received via email at the time of purchase in the Serial Key field.
- Enter the activation key that you have received via email at the time of purchase in the Activation Key field.
Step – 3
Next, expand the General Settings section and do the following:
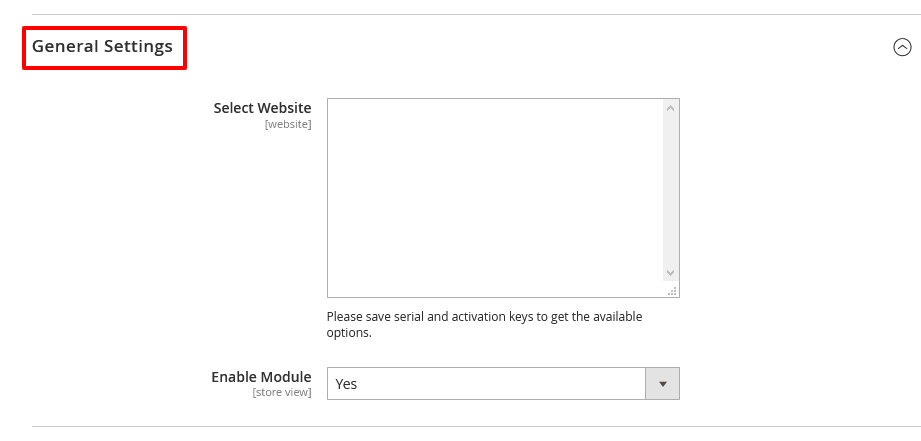
- Select your store in the Select Website field. Remember that you need to first save the serial as well as activation keys in order to get the website list available.
- Select YES in the Enable Module field.
Step – 4
Now, expand the Credit Points Settings section and do the following:
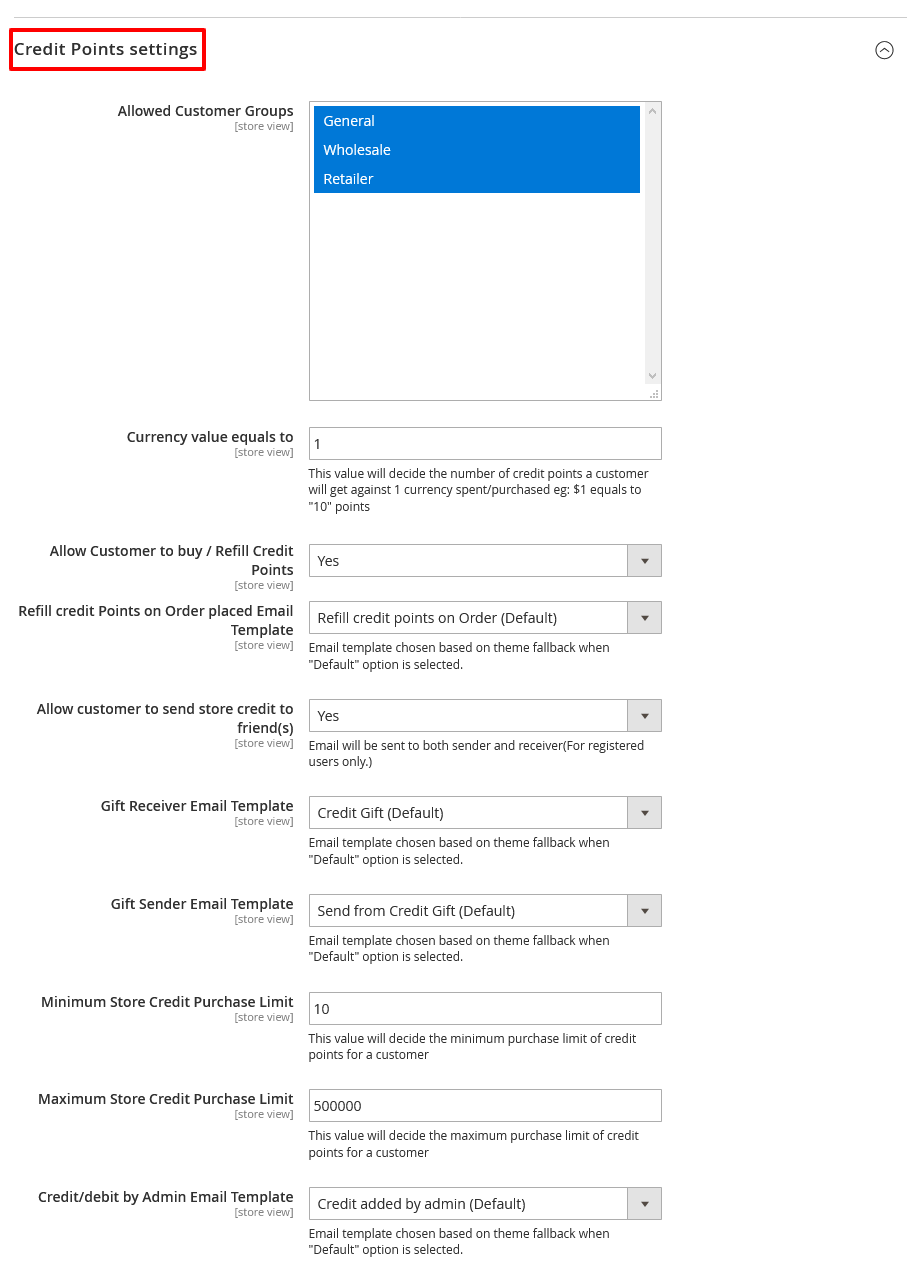
- Select General, Wholesale, & Retailer in the Allowed Customer Groups field.
- Enter a numeric value in the Currency Value Equals To field for the number of credit points a customer will get against 1 currency purchased/spent.
- Select YES in the Allow Customer to Buy/Refill Credit Points field.
- Select Refill Credit Points on Order (Default) in the Refill Credit Points on Order Placed Email Template field.
- Select YES in the Allow Customer to Send Store Credit to Friend(s) field.
- Select Credit Gift (Default) in the Gift Sender Email Template field.
- Enter a numeric value in the Minimum Store Credit Purchase Limit field for deciding the minimum purchase limit of credit points.
- Enter a numeric value in the Maximum Store Credit Purchase Limit field for deciding the maximum purchase limit of credit points.
- Select Credit Added by Admin (Default) in the Credit/Debit by Admin Email Template field.
Step – 5
Finally, scroll down to the Pagination section and do the following:
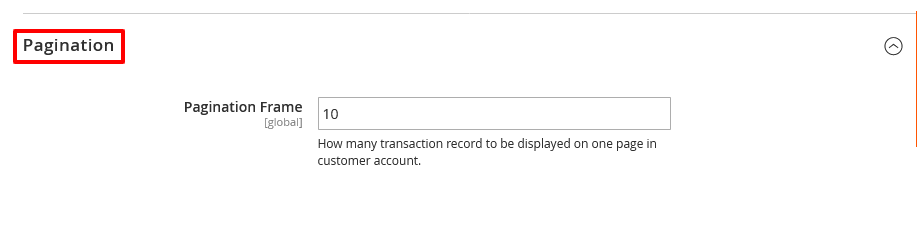
- Write a numeric value in the Pagination Frame field for deciding how many transactions records to display on one page.
Final Words…
And that’s about it! This is the best way to configure Magento 2 Store Credit Extension and introduce the store credit feature in your Magento 2 store.
And if you need our professional assistance, feel free to contact us at any time.