
 (2 votes, average: 5.00 out of 5)
Effective communication is extremely crucial when it comes to eCommerce business.
In fact, any business that communicates effectively with its customers always has an edge over its competitors.
And for eCommerce businesses, there is no better way to engage customers than the SMS notifications.
Unlike all other eCommerce communication channels, SMS has a striking 95% of open rate and a whopping 35% of click through rate.
The main reason why SMS notifications are so successful in eCommerce is because they help you to meet your customers where they are (which is on their phone).
The point is, if you’re planning to launch an eCommerce store, then SMS notification is something you cannot afford to neglect.
Moreover, if your store is based on Magento 2 platform, integrating the SMS notification functionality is almost effortless.
In this post, we’re going to teach you how to configure SMS notification in your Magento 2 store.
Step-by-Step Process to Configure SMS Notification in Magento 2
In order to implement SMS notification functionality in your Magento 2 store, first, you need to get the Magento 2 SMS Notification Extension.
Once you’ve purchased & installed SMS Notification extension, you need to follow the below steps carefully to properly configure SMS notification extension.
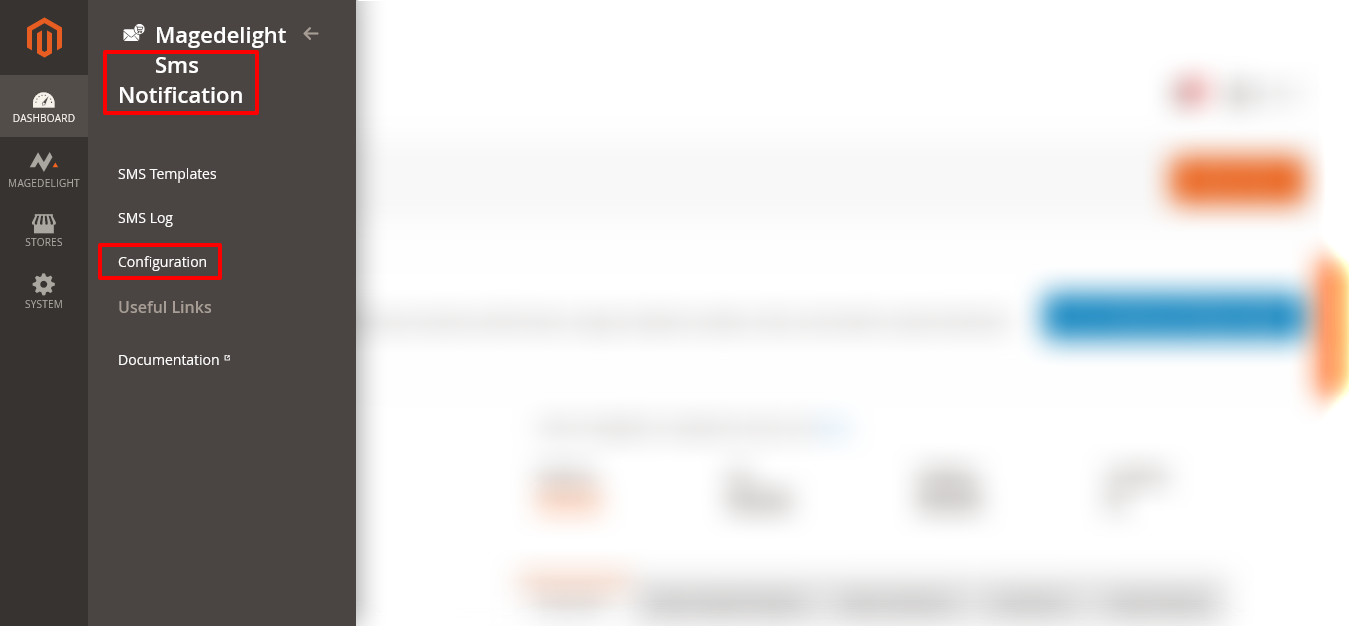
Step – 1
First of all, login to your admin panel and navigate to Stores > SMS Notification > Configuration.
Step – 2
After that, expand the General Configuration section and do the following:
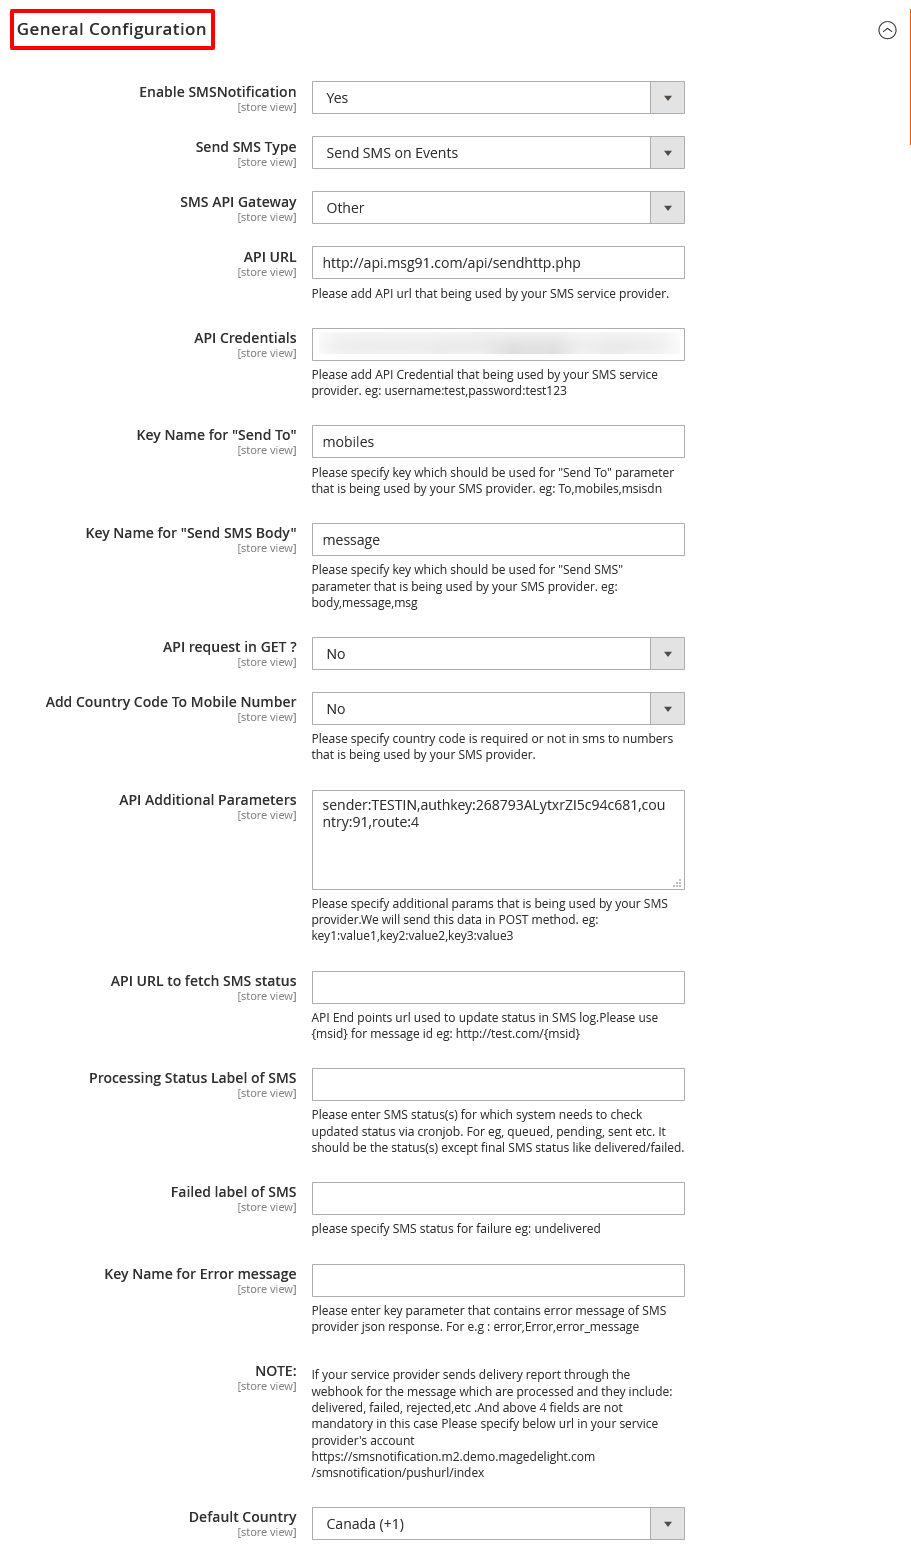
- Select YES in the Enable SMS Notification field.
- Select Send SMS On Events in the Send SMS Type field.
- Select Other in the SMS API Gateway field.
- Write a URL for SMS provider’s API in the API URL field.
- Write credentials for API in the API Credentials field.
- Write a specific key in the Key Name For “Send To” field.
- Write a specific key in the Key Name For “Send SMS Body” field.
- Select NO in the API Request In GET? Field.
- Select NO in the Add Country Code To Mobile Number field.
- Specify additional parameters in the API Additional Parameters field.
- Write a URL for API endpoints in the API URL To Fetch SMS Status field.
- Write a text for SMS status for failure in the Failed Label of SMS field.
- Write a key parameter with an error message in the Key Name for Error Message field.
- Select a default dialing code for the country in the Default Country field.
Step – 3
Next, expand the Admin SMS Configuration section and do the following:
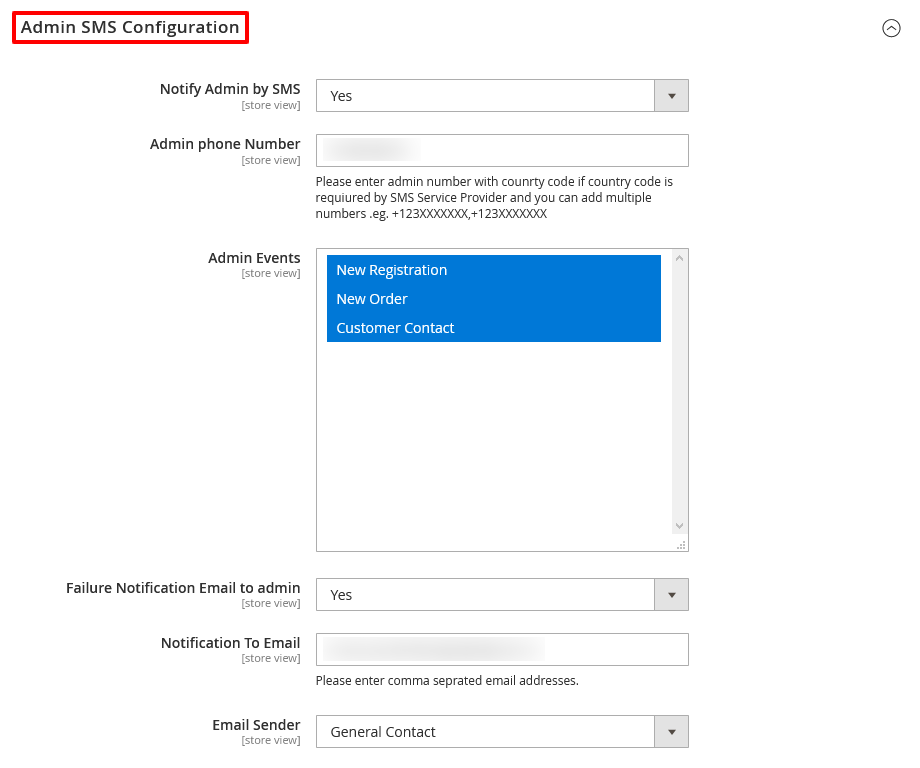
- Select YES in the Notify Admin by SMS field.
- Write your phone number in the Admin Phone Number field.
- Select events for which you want to receive SMS notifications in the Admin Events field.
- Select YES in the Failure Notification Email to Admin field.
- Write an email address where you want to receive notifications in the Notification To Email field.
- Select General Contact in the Email Sender field.
Step – 4
Now, expand the Customer SMS Configuration section and do the following:
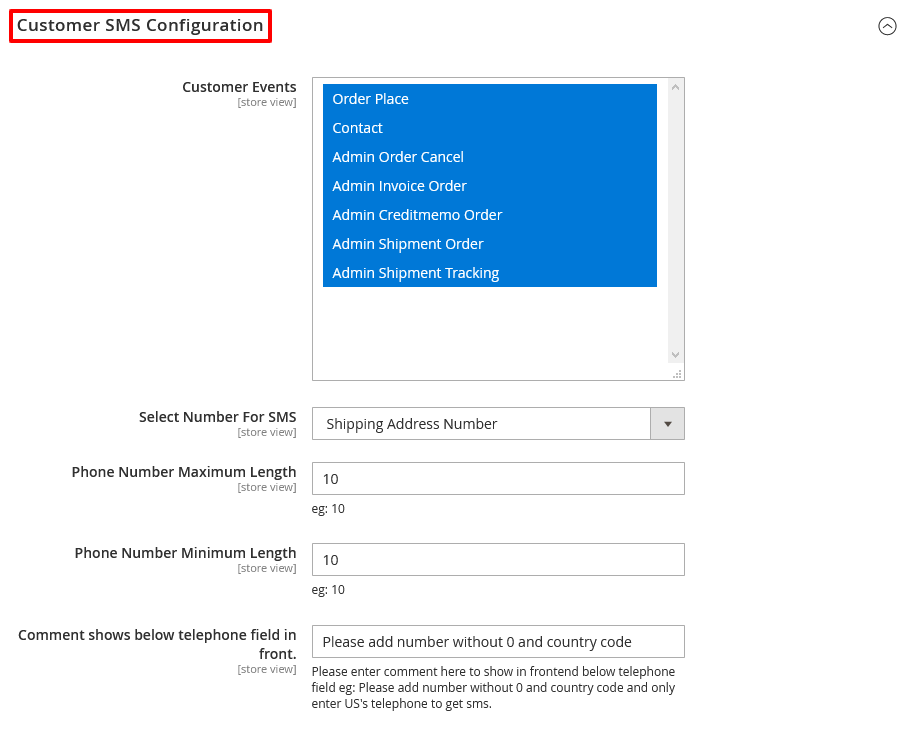
- Select all events that you want to in the Customer Events field.
- Select Shipping Address Number in the Select Number for SMS field.
- Write “10” in the Phone Number Minimum Length field.
- Write a text comment in the Comment Shows Below Telephone Field in Frontend field.
Step – 5
Lastly, expand the SMS Log Setting section and do the following:
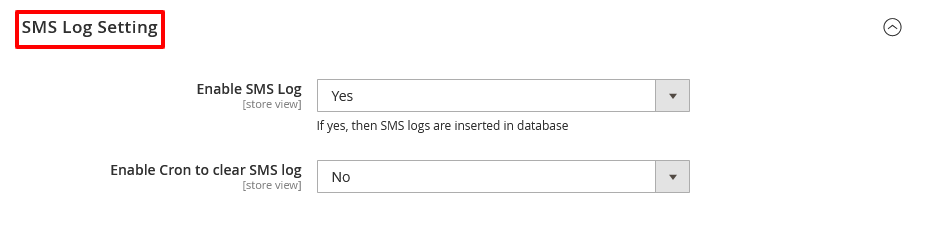
- Select YES in the Enable SMS Log field.
- Select NO in the Enable Cron to Clear SMS Log field.
Ending Note…
And that’s about it!
This is the easiest way to configure MageDelight SMS Notification Extension in your Magento 2 store.
We hope that you found this tutorial helpful. If you have any queries, please ask them in the comments below.
And if you need our professional assistance, feel free to contact us at any time.