

 (3 votes, average: 4.67 out of 5)
Today, we’re going to teach you guys how to configure multi-currency in Magento 2.
Having multi-currency in your Magento 2 store will allow customers to easily determine the price of products in their home currency.
Once you’ve configured multi-currency, customers will be able to see currency symbols in product prices as well as in sales documents like invoices & orders.
Furthermore, customers can choose their preferred currency from the currency chooser via the header of the storefront.
The best part is, there are over 20 currency units of the corresponding countries that you can set up in your store.
This, in turn, will drastically improve the customer experience of your Magento 2 store.
With that, let’s quickly jump onto the process of configuring multi-currency in your Magento 2 store.
Step-by-Step Process to Configure Multi-Currency in Magento 2
Below are the steps you’ll need to follow in order to learn how to configure multi-currency in your Magneto 2 store.
Step 1
First of all, login to your admin panel and navigate to Stores > Settings > Configuration.
After that, under the General tab on the left-side panel, click on the Currency Setup.
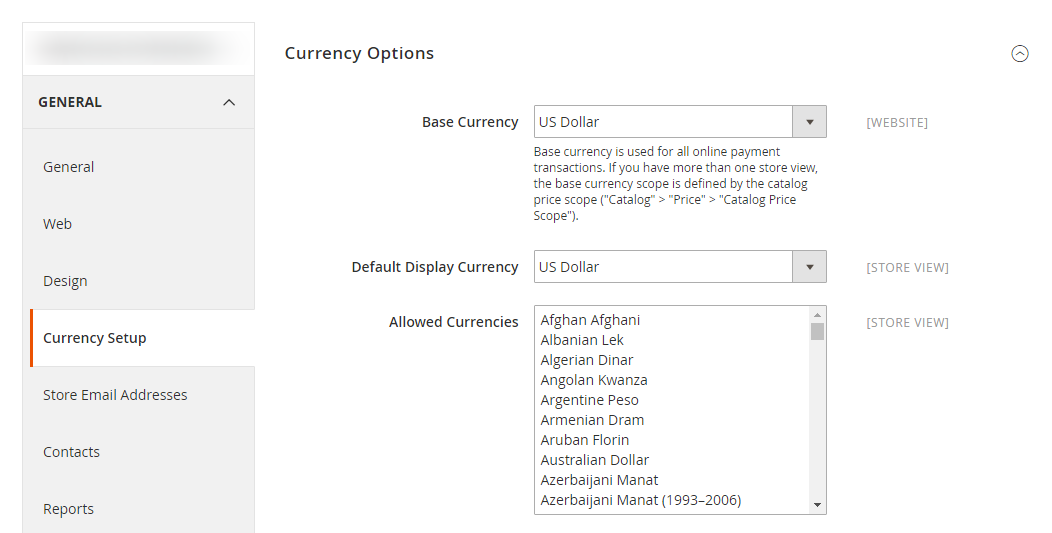
Next, open the Currency Options section and do the following:
- Select your store’s primary currency in the Base Currency dropdown field.
- Select a display currency in the Default Display Currency dropdown field to display pricing in your store.
- Now, in the Allowed Currencies field, collect all currencies you need for your store. For multi-currency, hold the Ctrl key and then select each preferred currency option.
Next, if the system displays a reminder message about cache refreshment, Close it and refresh the cache later.
Now, we need to determine the scope of the base currency.
For that, go to the Catalog tab from the left-side panel, select Catalog, and then click on the Price section.
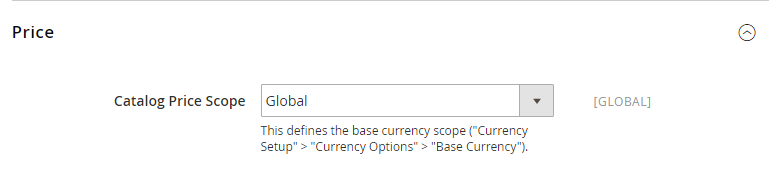
Here, under the Price tab, select either “Website” or “Global” in the Catalog Price Scope dropdown field as shown in the screenshot above.
Step 2
First, go to the left-side panel and click on the Currency Setup given under the General tab.

After that, open the Webservicex section and write the accepted duration (in seconds) in the Connection Timeout in Seconds field for inactivity before the connection times out.
Step 3
The next step of the process is to go back to the Currency Setup section and open the Scheduled Import Settings.
Now, if you want to auto-update the currency rate in your Magento 2 store, select Yes in the Enabled field as shown in the screenshot below and do the following.
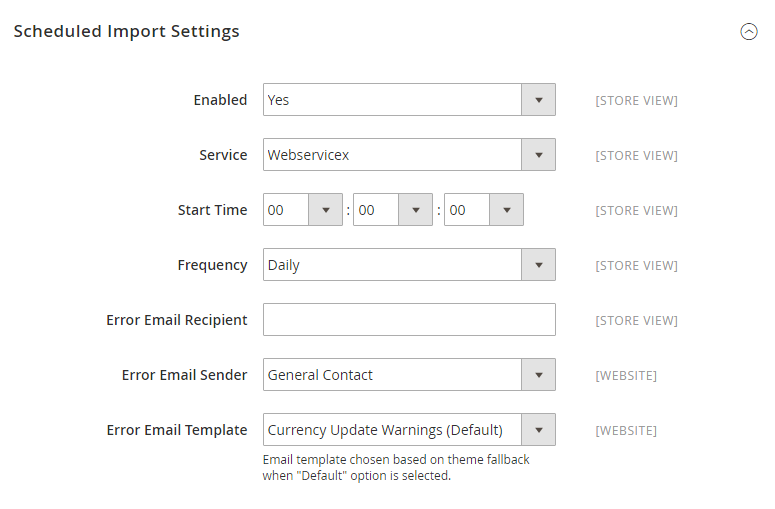
- Set Services to your preferred option. The default value is Webservicex.
- Set Start Time to auto-update the rate.
- Set Frequency for rate updating to either daily, weekly, or monthly.
- Write an email address in the Error Email Recipient field to receive email notifications when there is an error during the import process. To put multiple recipients, put a comma to separate them.
- Select your preferred option in the Error Email Sender field who will appear on the email notification.
- Select your preferred option in the Error Email Template field to use pre-installed email templates for error notification.
Finally, once everything is done, click on the Save Config button to finish the process.
Concluding Thoughts…
And there you have it! – the easy, step-by-step process to configure multi-currency in your Magento 2 store.
And if you need our professional assistance, feel free to contact us at any time.
Recommended Read: Magento 2 GeoIP Extension to Automatically Redirect User to their Local Currency
