


 (3 votes, average: 3.67 out of 5)
Layered Navigation is one of the new features that come in the Magento 2 platform. By using layered navigation, you can allow your customers to easily find the best-fit products on your Magento 2 eCommerce store.
In simple words, through layered navigation, customers can filter products on your online store by either product attributes or prices.
This, in turn, enhances the customer experience and helps to gain more sales.
So, if you haven’t yet configured the Magento 2 default layered navigation feature, you definitely should.
Alternatively, you can also directly install Magento 2 Layered Navigation Extension to your online store and free yourself from going through this hassle (more on this later).
Right now, let’s look at how to configure Magento 2 default layered navigation feature with a step-by-step process.
Step-by-Step Process to Configure Layered Navigation in Magento 2
This tutorial will guide you through the entire process of configuring the default layered navigation in Magento 2.
Step 1: Login into the Magento 2 Admin Panel and Navigating to the Layered Navigation settings
First of all, login to your admin panel and navigate to Stores > Configuration >Catalog >Catalog from the admin sidebar.
After that, select Layered Navigation as shown in the screenshot below.
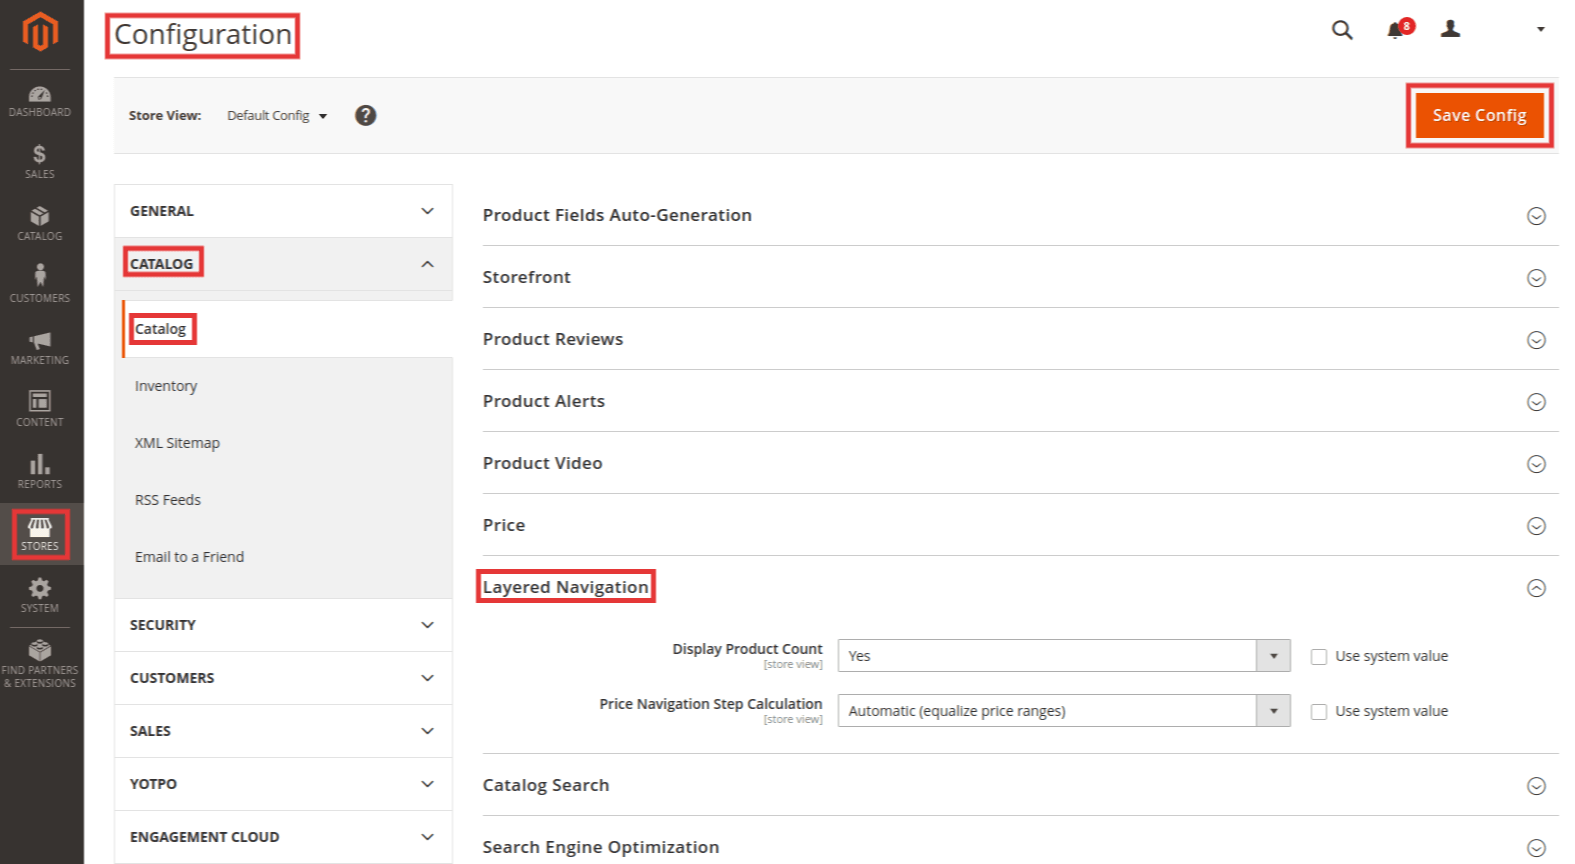
Step 2: Enabling layered navigation
Now, Click on the Layered Navigation to expand the tab and you will see a screen like shown in the image below.

Here, you need to do the following:
- Select Yes in the Display Product Count.
- Set Price Navigation Step Calculation to Automatic (Equalize Price Ranges).
The Automatic (Equalize Price Ranges) basically uses the standard algorithm for price navigation.
Alternatively, you can also set Price Navigation Step Calculation to Automatic (Equalize Product Counts) as well as Manual.
Step 3 : Configure Price Navigation Step Calculation to Automatic
To set Price Navigation Step Calculation to Automatic (Equalize Product Counts), select the Automatic (Equalize Product Counts) option from the dropdown menu.
Set Display Price Interval as One Price to Yes.
And in the Division Limit, enter the threshold for the number of products within a price range.
Step 4: Configure Price Navigation Step Calculation to Manual
To set Price Navigation Step Calculation to Manual, select the Manual option from the dropdown menu.
Enter the value for Default Price Navigation Step.
Enter the limit of Maximum Number of Price Intervals Allowed up to 100.
Step 5: Save the Configurations
Next, click on the Save Config to finish the process.
How to Configure Layered Navigation with Filterable Attributes?
Besides the standard layered navigation, you can also provide your customers with layered navigation with filterable attributes.
Please follow the below step-by-step process to learn how to configure layered navigation with filterable attributes.
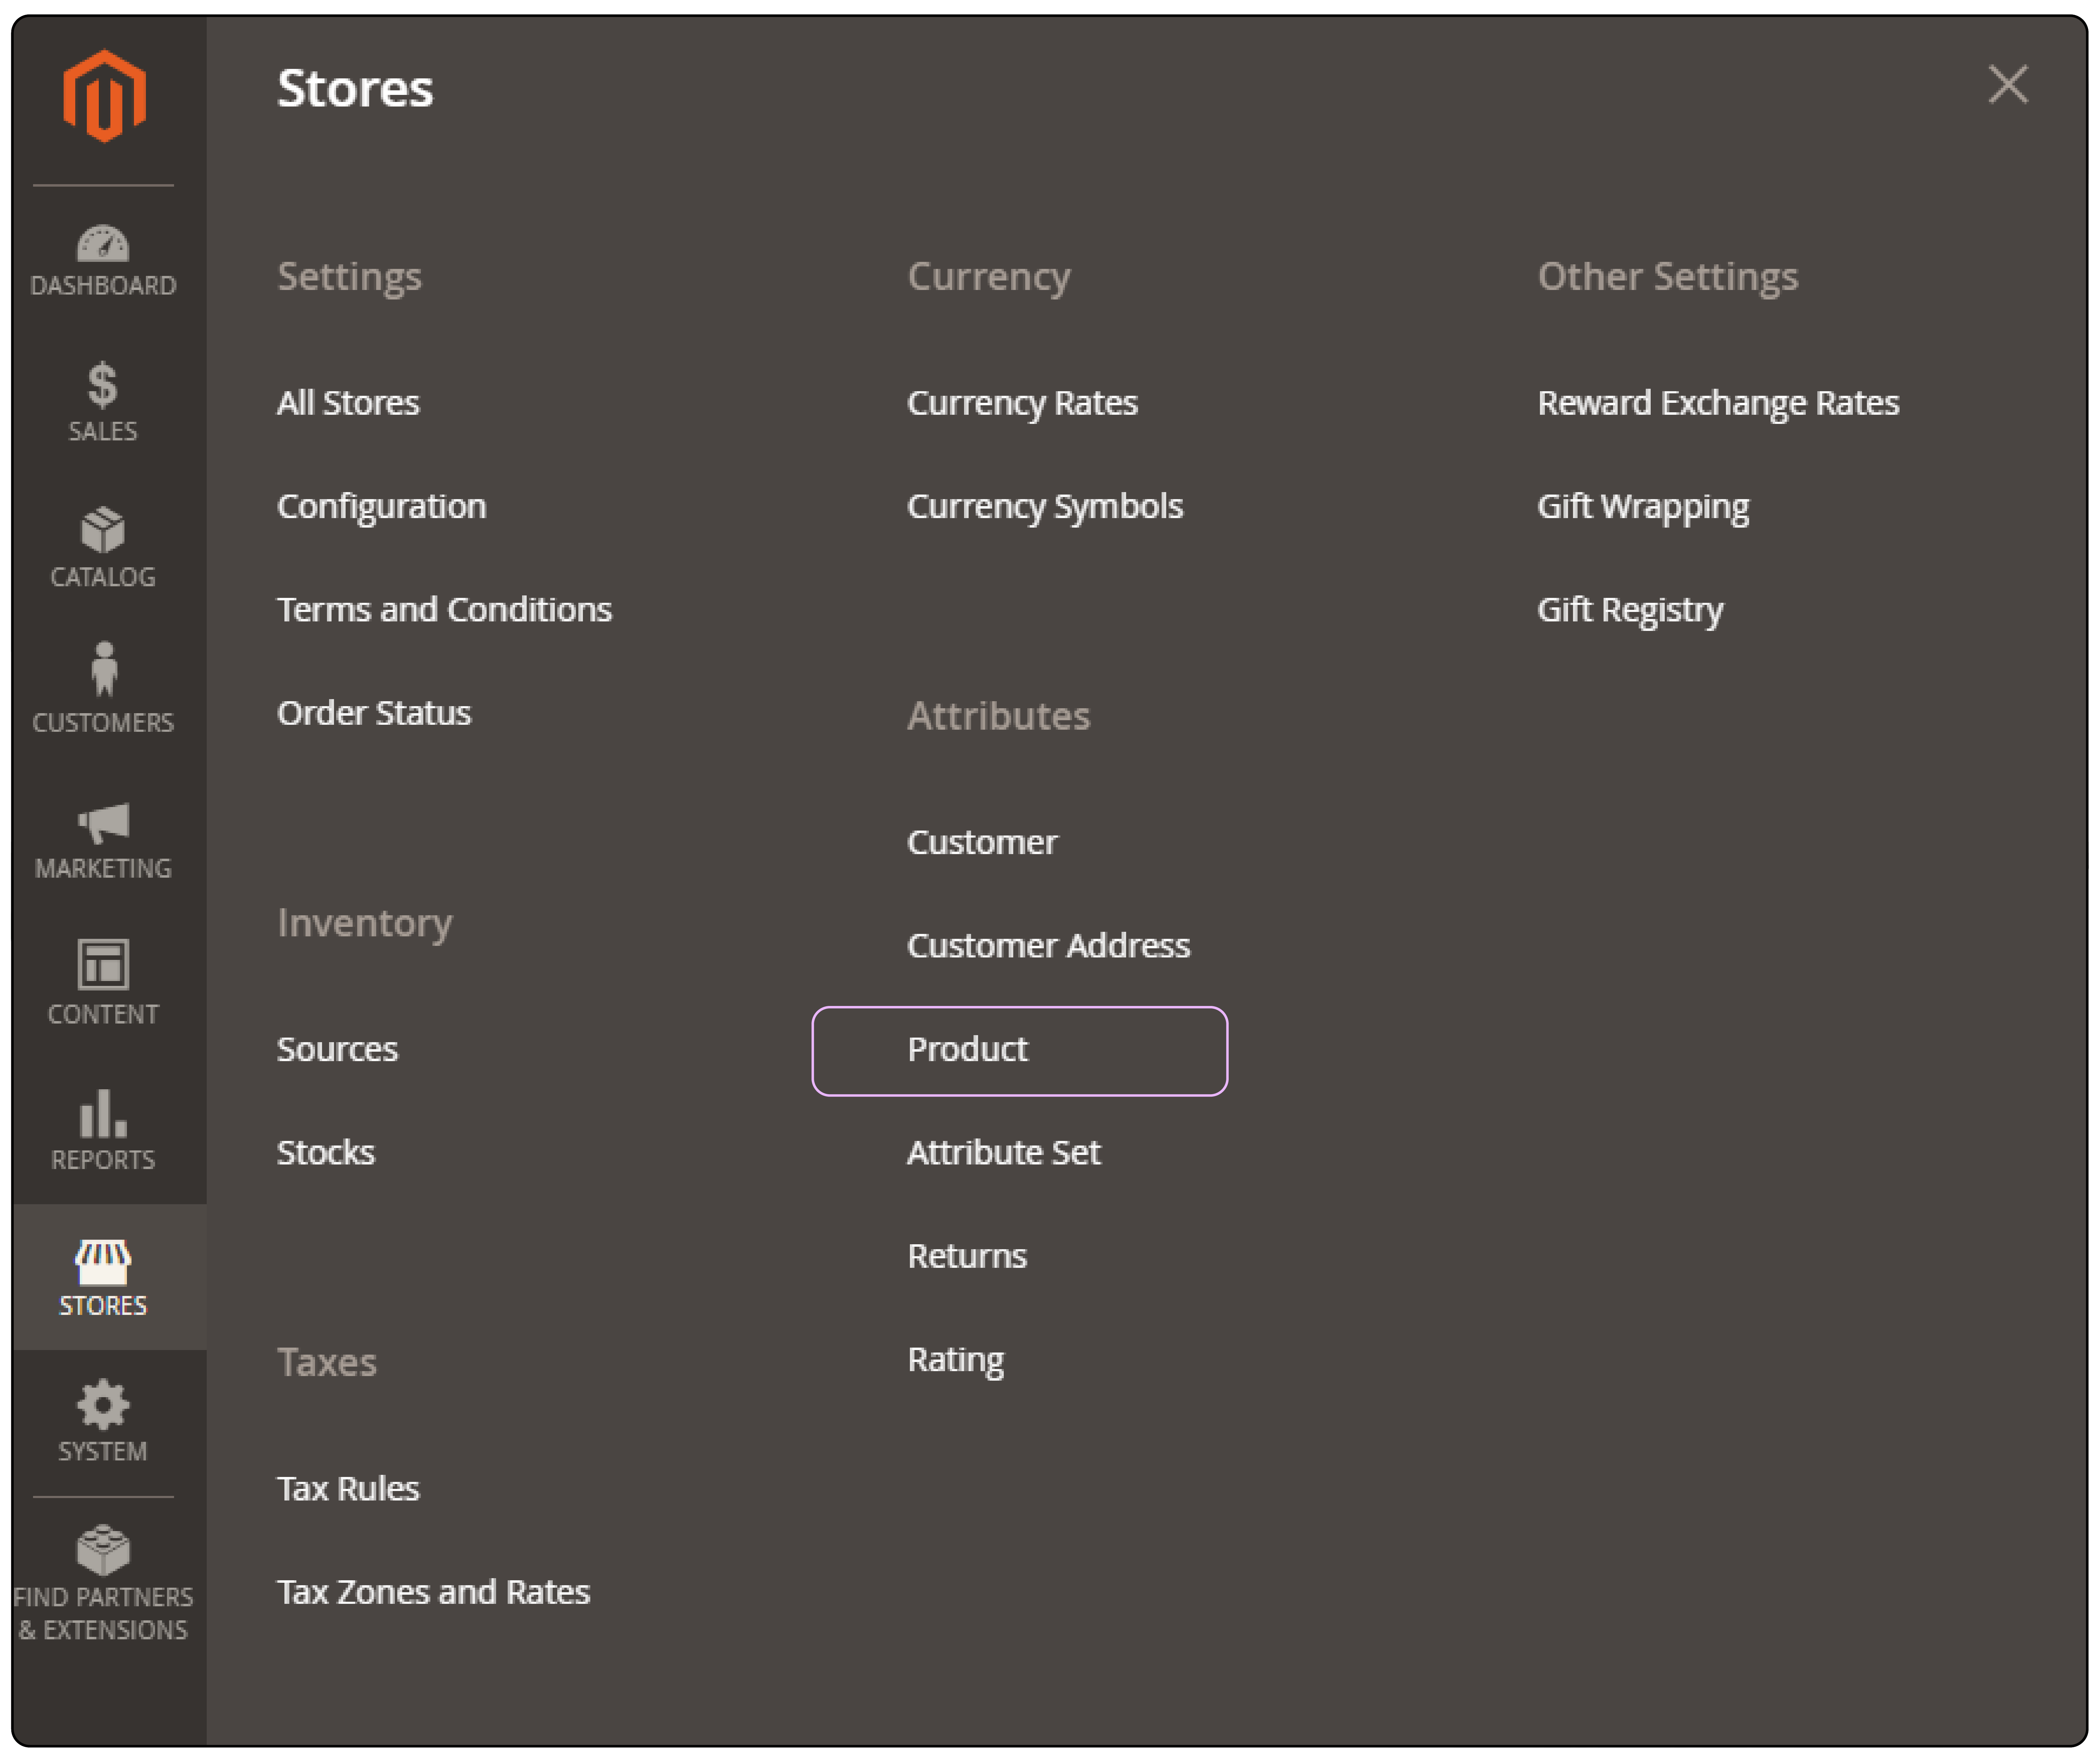
Step 1: Navigate to Store > Attributes > Product
Login to your admin panel and navigate to Store > Attributes > Product from the Admin sidebar and open it in Edit mode.
Step 2 : Store > Attributes > Product.
Now, click on the Storefront Properties to explore as shown in the screenshot below.
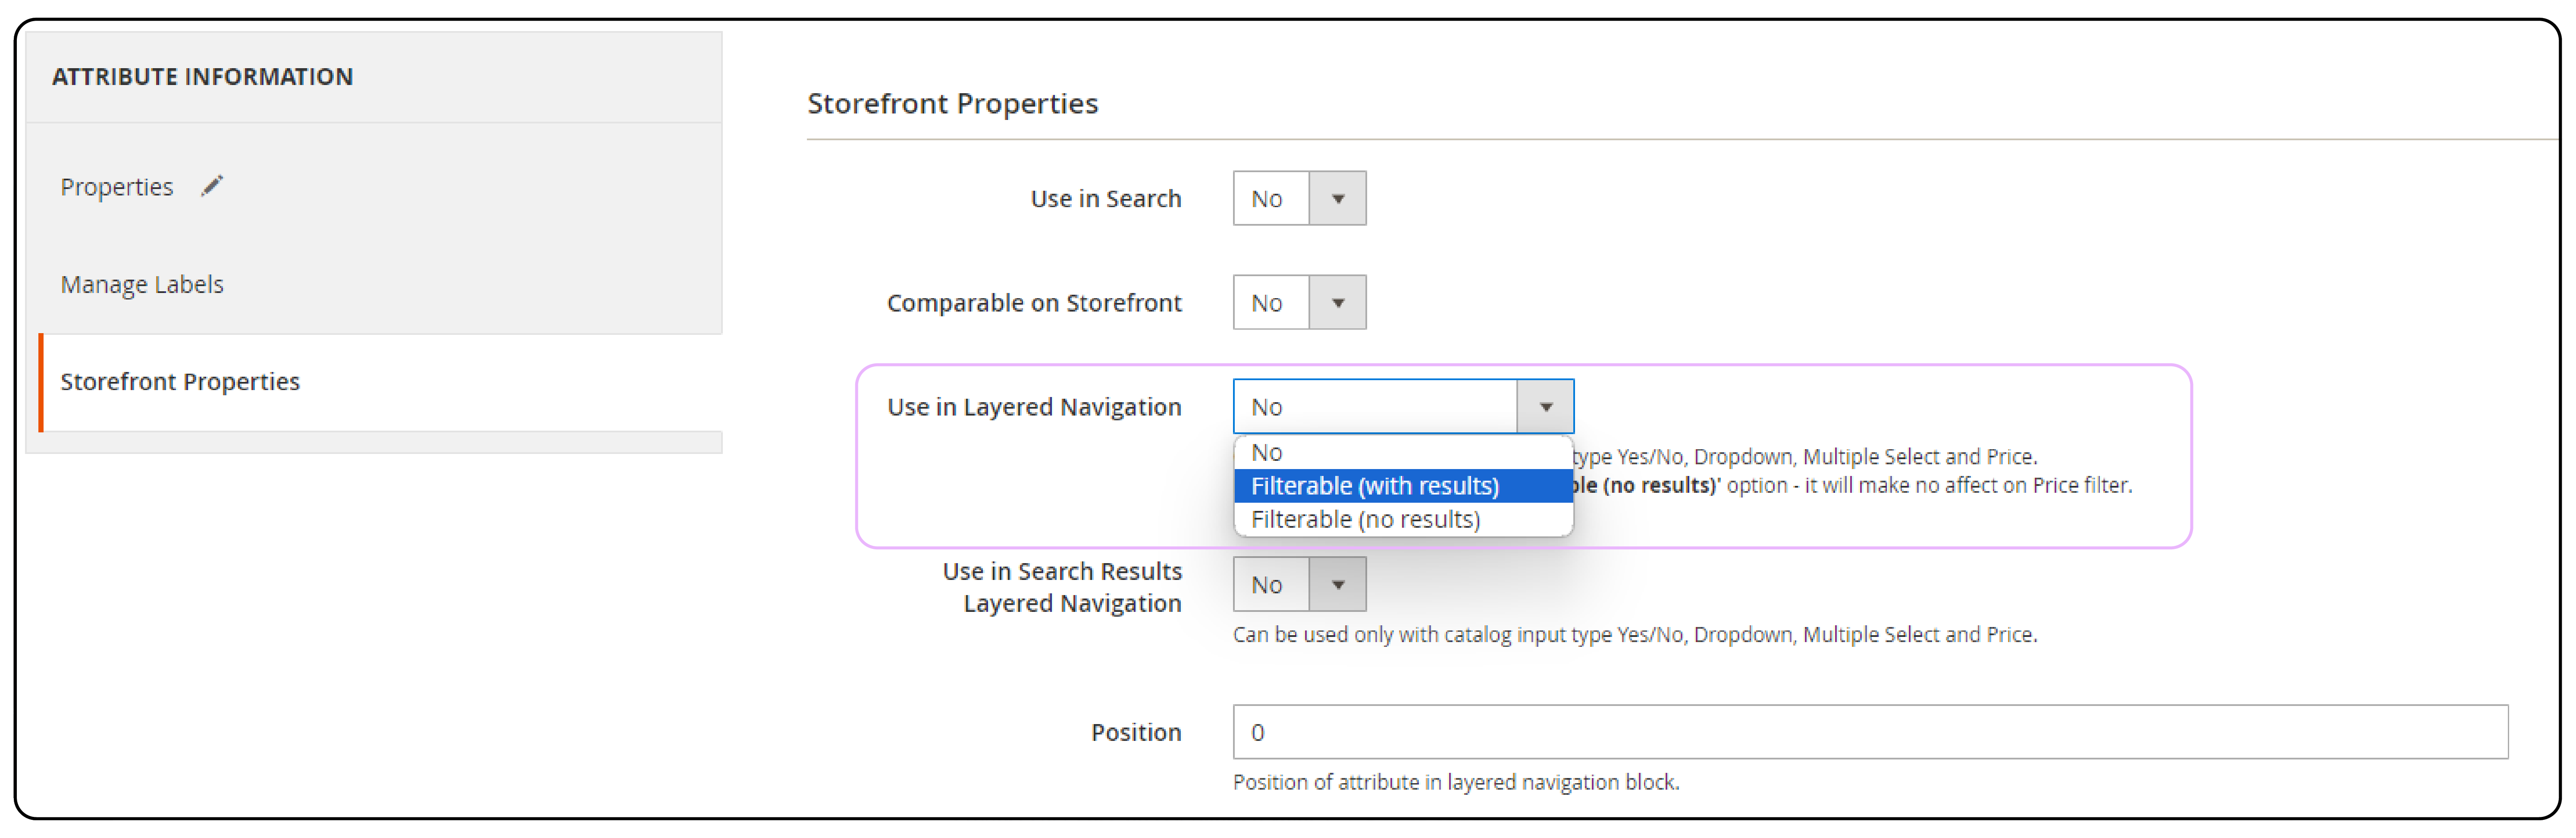
Step 3: Configure the Use In Layered Navigation
Here, change the Use In Layered Navigation to Filterable (with results) or Filterable (no results).
Next, select Yes in the Use In Search Results Layered Navigation field.
Step 4: Save Attributes to implement the changes.
Repeat step number #3 for every attribute to include in the layered navigation.
How to Enable Layered Navigation for a Selected Category in Magento 2?
Step 1 : Goto the Admin sidebar and navigate to Catalog > Products > Categories.
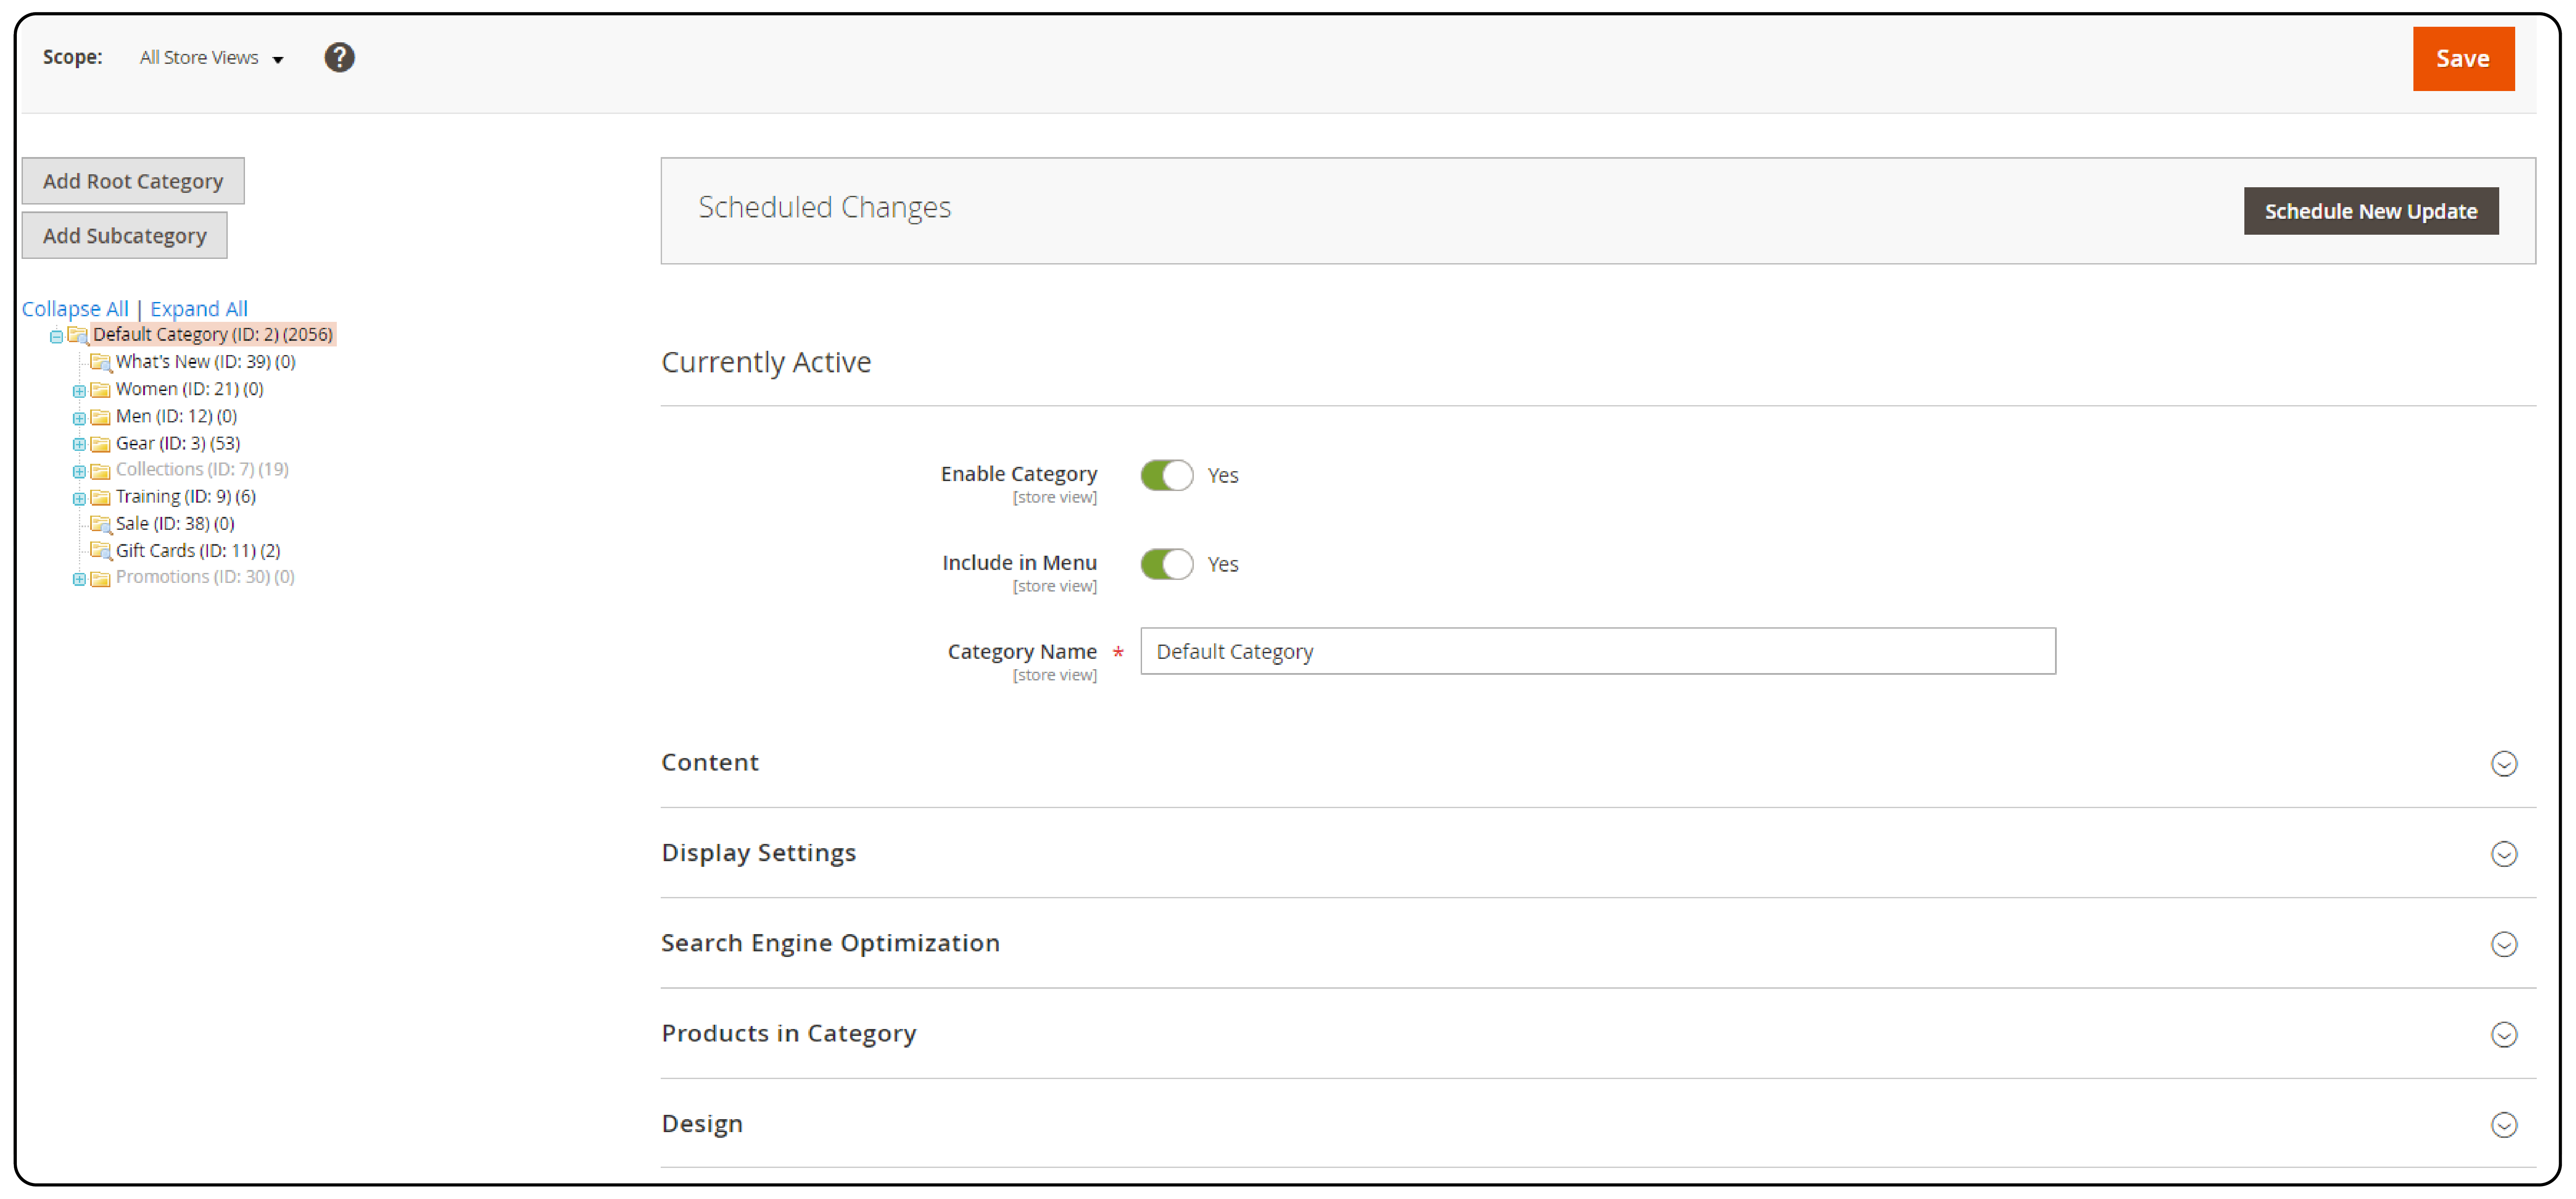
Step 2 : Here, select the Categories you would like to use Layered Navigation in.
Step 3 : Change to the Display Settings tab and switch the Anchor option to Yes. This will enable layered navigation for that category.
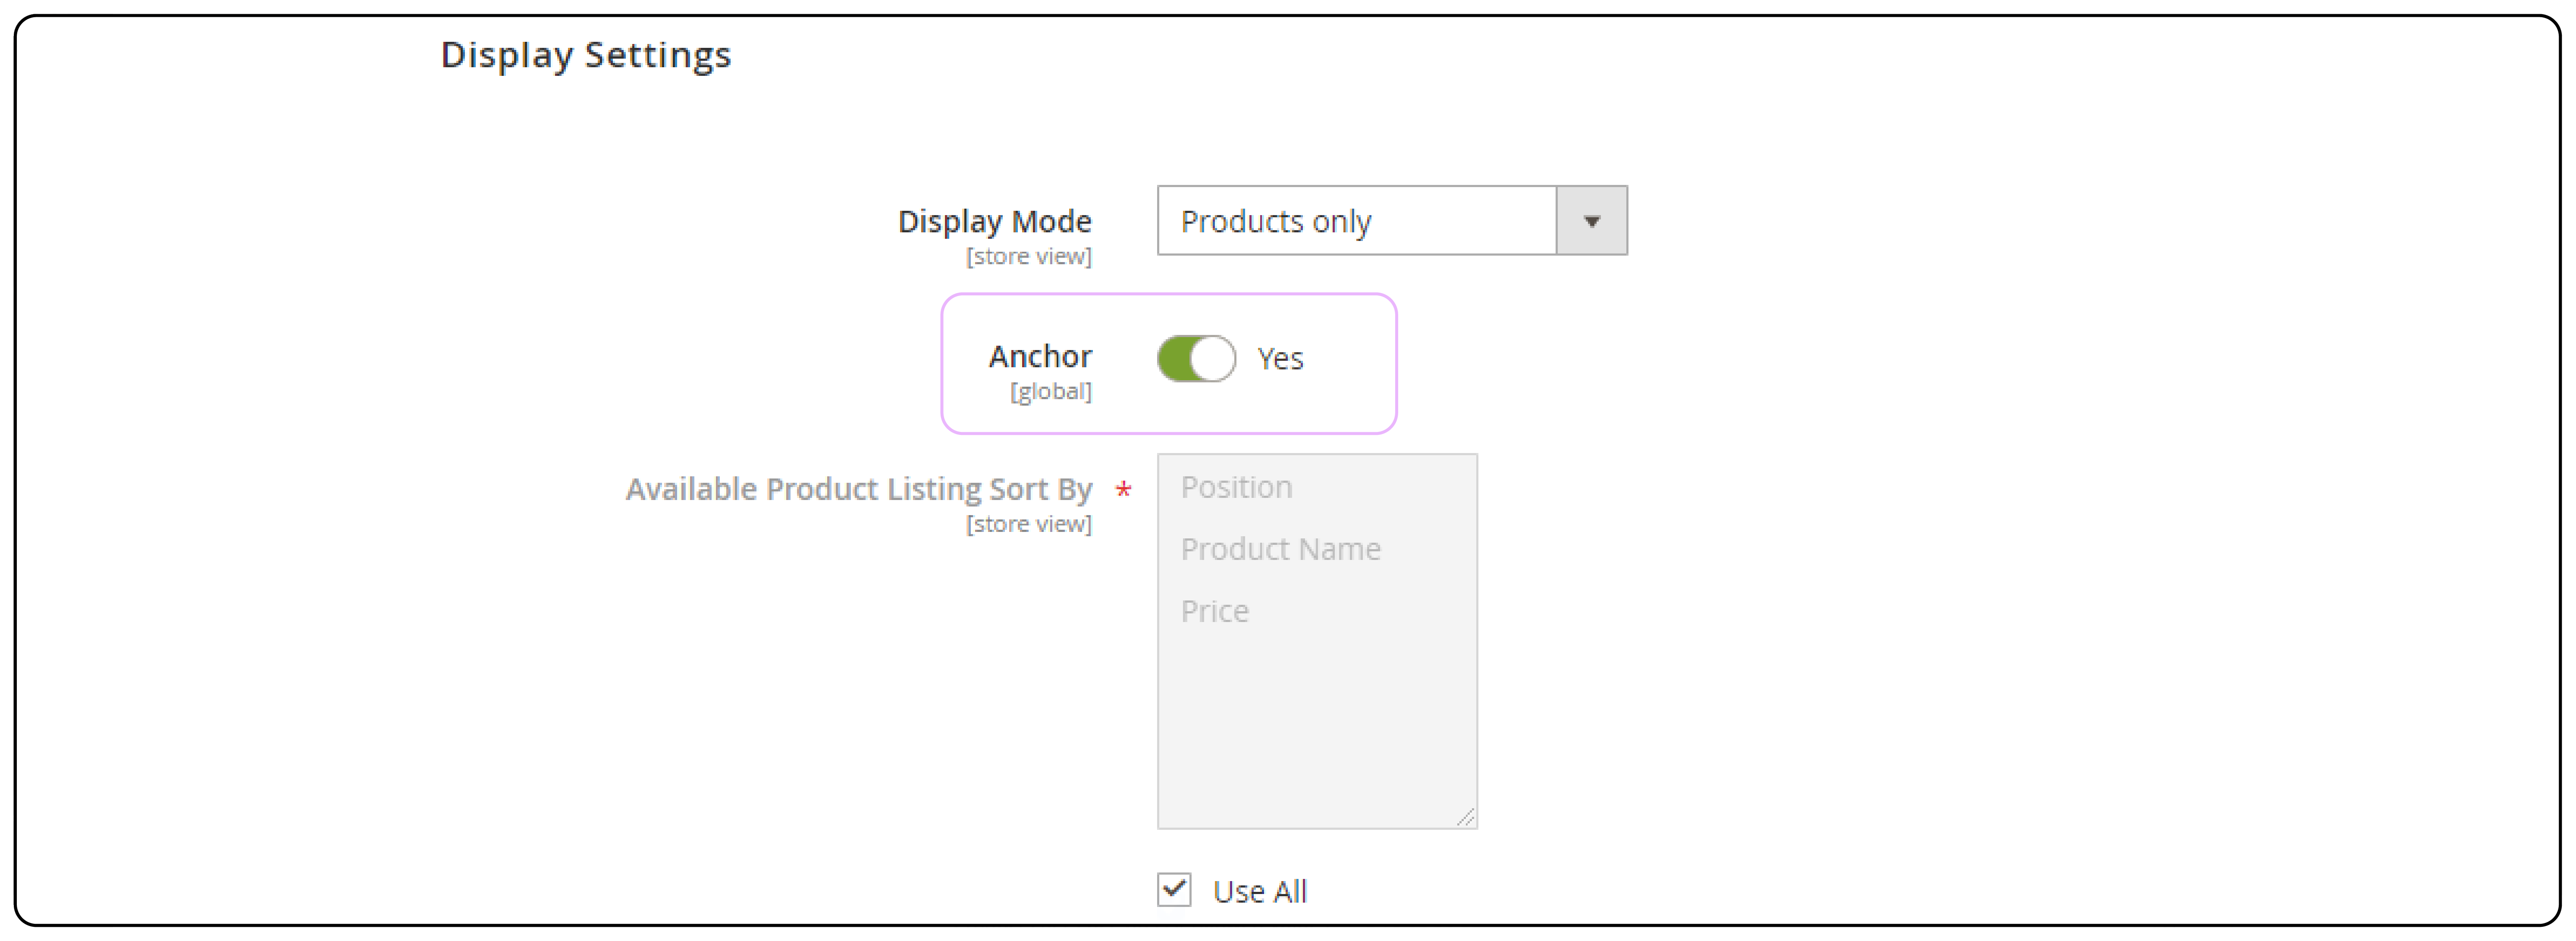
Step 4 : Lastly, click on the Save Category button to finish the process.
Conclusion:
There you have it! – the step-by-step process to configure default layered navigation in Magento 2 with filterable attributes.
Now, if this process seems too long or complicated, there is a simple solution.
You can easily avoid the entire technical hassle by integrating Magento 2 Advanced Layered Navigation Extension into your online store.
The extension will help you to make the navigation of your Magento 2 store simpler, while also enhancing the customer experience and improving SEO rankings in search results.
And if you need our professional assistance, feel free to contact us at any time.
Related Articles you may like:
Advanced Layered Navigation Magento 2 Features that maximize your online sale
Improve your Site Navigation with Magento 2 Layered Navigation Module