
 (1 votes, average: 5.00 out of 5)
Today, we’re going to teach you guys how to configure GeoIP in Magento 2.
GeoIP refers to the method of locating a computer’s geographic location by identifying its IP address.
And the main use of GeoIP is to determine users’ location and tailor the content specifically for that location.
In other words, GeoIP is mostly used for restricting access, spam prevention, statistical research, and targeted advertising.
Nowadays, GeoIP is being heavily used in the eCommerce industry. It helps online stores to market their customer base more accurately & effectively.
This, as a result, helps to boost conversions & the overall revenue for online stores. Now, if you’re a Magento 2 based eCommerce store owner, then we have good news for you.
In this post, we’re going to show you exactly how to configure GeoIP in your Magento 2 store.
Step-by-Step Process to Configure GeoIP in Magento 2
To configure GeoIP in your Magento 2 store, you need to get the Magento 2 GeoIP Extension.
Once you’ve purchased & installed the GeoIP extension, you need to carefully follow the below steps to configure it in your Magento 2 store.
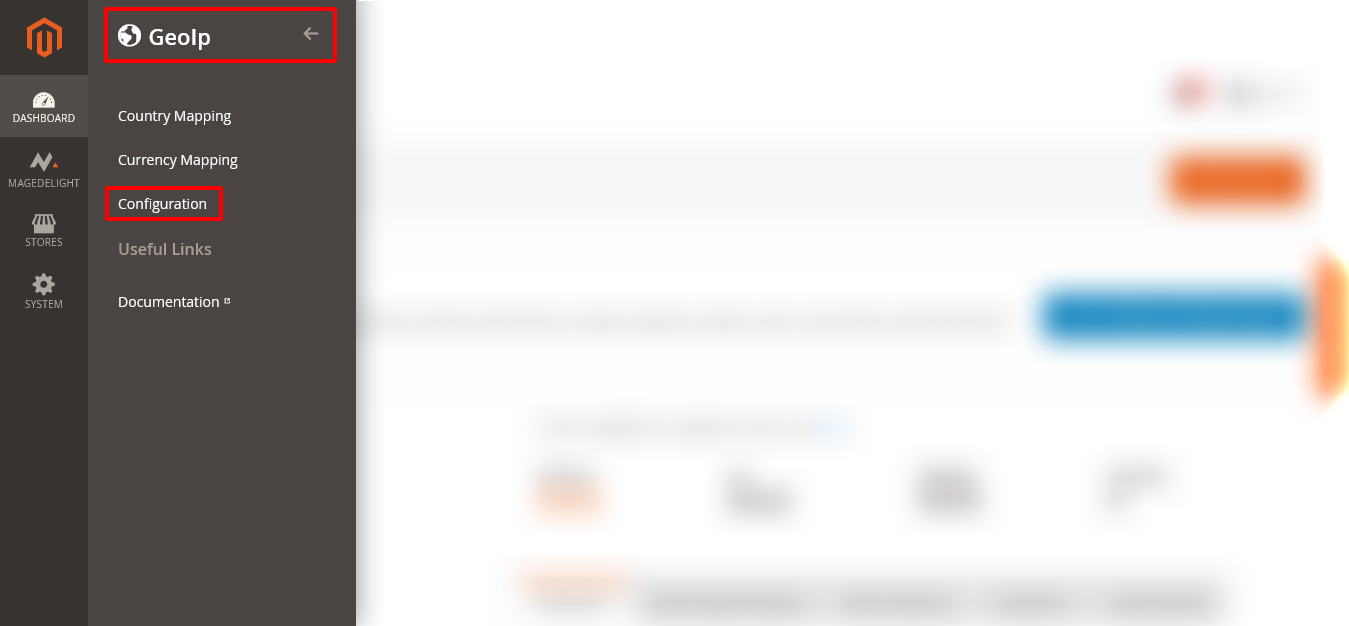
Step – 1
First of all, login to your admin panel and navigate to Stores > GeoIP > Configuration.
Step – 2
After that, expand the General Configuration section and do the following:
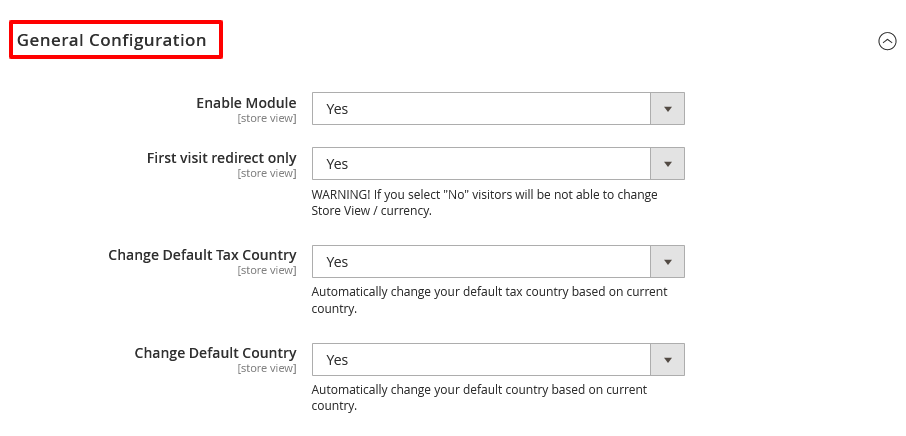
- Select YES in the Enable Module field.
- Select YES in the First Visit Redirect the Only field.
- Select YES in the Change Default Tax Country field.
- Select YES in the Change Default Country field.
Step – 3
Next, expand the Restriction section and do the following:
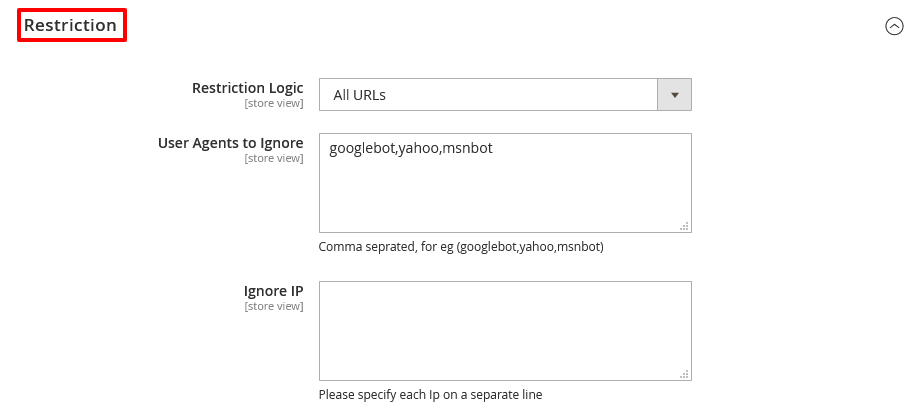
- Select All URLs in the Restriction Logic field.
- Write Googlebot, yahoo, msnbot in the User Agents to Ignore field.
- Leave blank in the Ignore IP field.
Step – 4
Now, expand the Restrict IP section and do the following:

- If you want to restrict any specific IPs, specify them in the Restrict IP field. It will automatically navigate restricted IP addresses to the 404 pages.
- If you don’t want to restrict any IP, leave the Restrict IP field blank.
Step – 5
After that, expand the Country Lookup Settings section and do the following:

- Select Database in the Lookup Method field.
Step – 6
Next, expand the Logs Settings section and do the following:

- Select YES in the Enable Logs field.
Step – 7
Lastly, expand the Test Mode section and do the following:

- Select NO in the Enable Test Mode field.
- Finally, click on the Save Config button to finish the process.
Concluding Thoughts…
And this is it! – the easiest process to configure MageDelight GeoIP Magento 2 Extension.
We hope that you found this tutorial helpful. If you have any questions, feel free to ask in the comments below.
And if you need our professional assistance, feel free to contact us anytime.