Today, we’re going to teach you guys how to configure eWallet feature in Magento 2.
eWallet is basically an electronic version of payment that is authorized to process transactions. These eWallets are required to be linked to specific credit or debit cards in order to function properly.
Now, one of the key elements that usually compel a potential customer to either make a purchase or abandon the shopping cart is the payment method.
According to the latest statistics, more than 2.1 billion users are now shopping through their smartphones. But, only a third of online sales account for smartphones.
One of the main reasons why is because of having to enter billing information on a small screen.
But, by providing the eWallet feature, you can instantly make shopping on your Magento 2 store a positive experience.
And in this post, we’re going to show you how to implement the eWallet feature in your Magento 2 store.
Step-by-Step Process to Configure eWallet in Magento 2
In order to implement the eWallet feature & let your customers make purchases without having to re-enter their billing information on your Magento 2 store, first, you need to get the Magento 2 eWallet Extension.
Once you’ve purchased & installed the eWallet extension, you need to follow the below steps carefully to configure the extension properly.
Step – 1
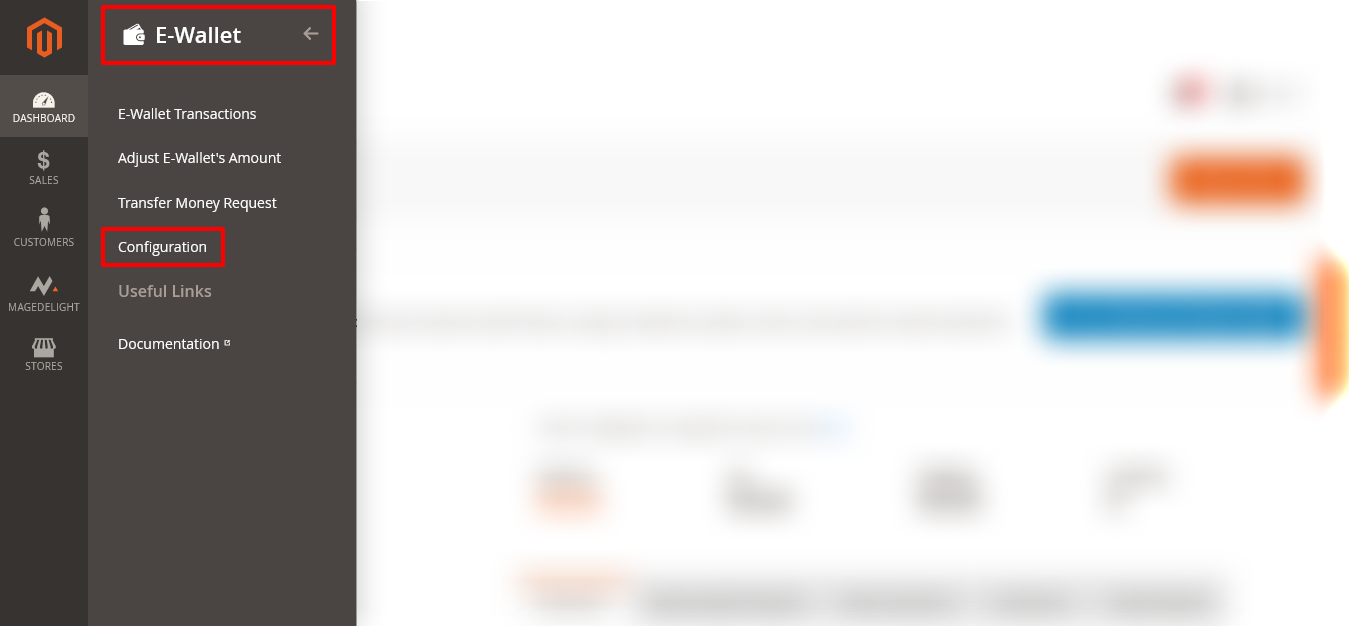
First of all, login to your admin panel and navigate to Stores > E-Wallet > Configuration.

Step – 2
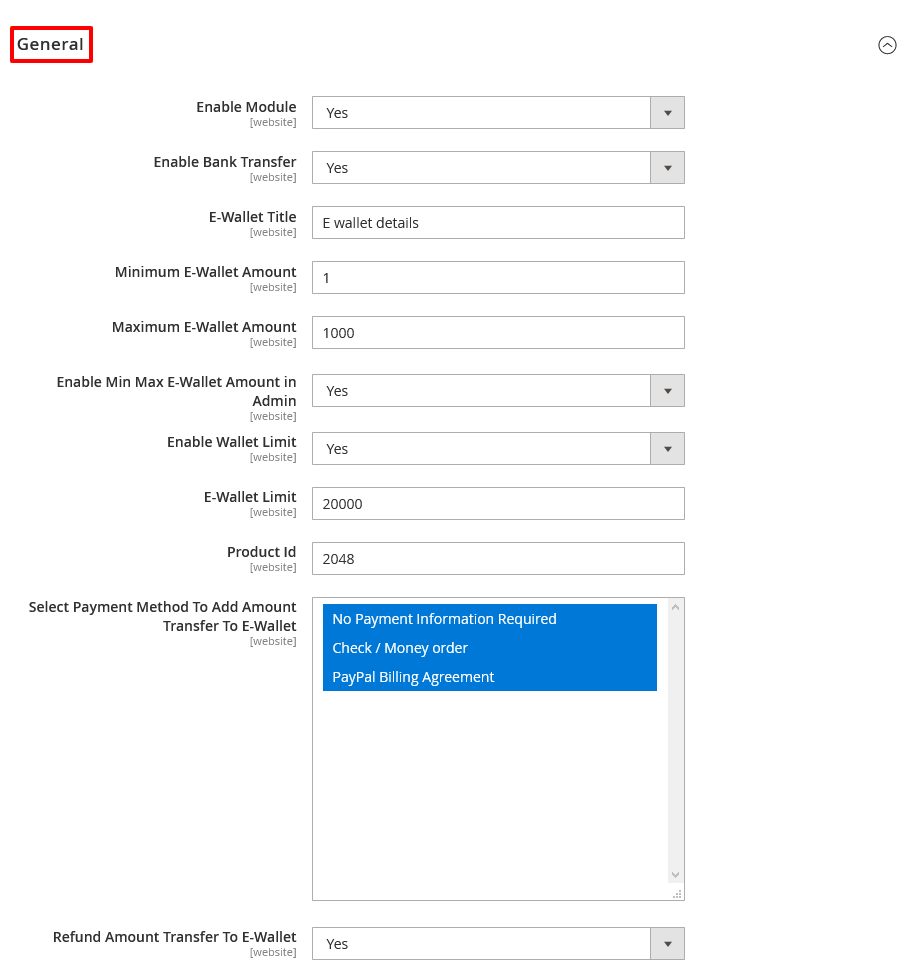
After that, expand the General section and do the following:

- Select YES in the Enable Module field.
- Select YES in the Enable Bank Transfer field.
- Write a text title in the E-Wallet Title field.
- Write a numeric value in the Minimum E-Wallet Amount field.
- Write a numeric value in the Maximum E-Wallet Amount field.
- Select YES in the Enable Min Max E-Wallet Amount In Admin field.
- Select YES in the Enable Wallet Limit field.
- Write a numeric value in the E-Wallet Limit field.
- Write a numeric value in the Product ID field.
- Select payment methods you want to in the Select Payment Method To Add Amount Transfer To E-Wallet field.
- Select YES in the Refund Amount Transfer to E-Wallet field.
Step – 3
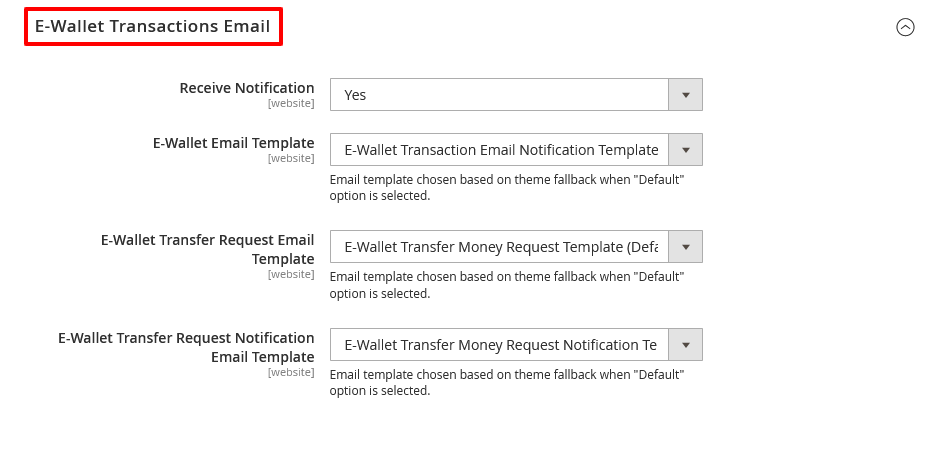
Next, expand the E-Wallet Transactions Email section and do the following:

- Select YES in the Receive Notification field.
- Select “E-Wallet Transaction Email Notification Template” in the E-Wallet Email Template field.
- Select “E-Wallet Transfer Money Request Template (Default)” in the E-Wallet Transfer Request Email Template field.
- Select “E-Wallet Transfer Money Request Notification Template (Default)” in the E-Wallet Transfer Request Notification Email Template field.
Conclusion
And there you have it!
The easiest way to implement the eWallet feature in Magento 2 store using MageDelight eWallet Extension for Magento 2.
We hope that you found this tutorial helpful. If you have any questions, please ask them in the comments below.
And if you need our professional assistance, feel free to contact us anytime.


