Adding customer attributes to your Magento 2 store can help the store owners collect additional information from customers and offer a better customer experience on your eCommerce store. In order to add custom attributes to the store, there are certain ways.
There are a plethora of Magento 2 Extensions available for the same, the additional attribute fields can also be added programmatically to the Magento 2 Store.
Display additional attributes with MageDelight Magento 2 Customer Attribute Extension. Purchased it already? Now, let us help you with the steps to configure customer attributes Magento 2 Extension to your Magento 2 Store.
Installation
- Unzip the extension package file into the root folder of your Magento 2 installation.
– Connect to the SSH console of your server
– Navigate to the root folder of your Magento 2 setup
– Run command as per below sequence,
php bin/magento setup:upgrade
php bin/magento setup:di:compile
php bin/magento setup:static-content:deploy
php bin/magento cache:clean
- log out from the backend and log in again
Configuration

- Enabled: Select “Yes” to enable the module for your store.
- Display customer attributes on the grid: Select “Yes” to display customer attributes in customer grid columns.
Now, let us learn how the functionality of this extension works and what all steps you can follow.

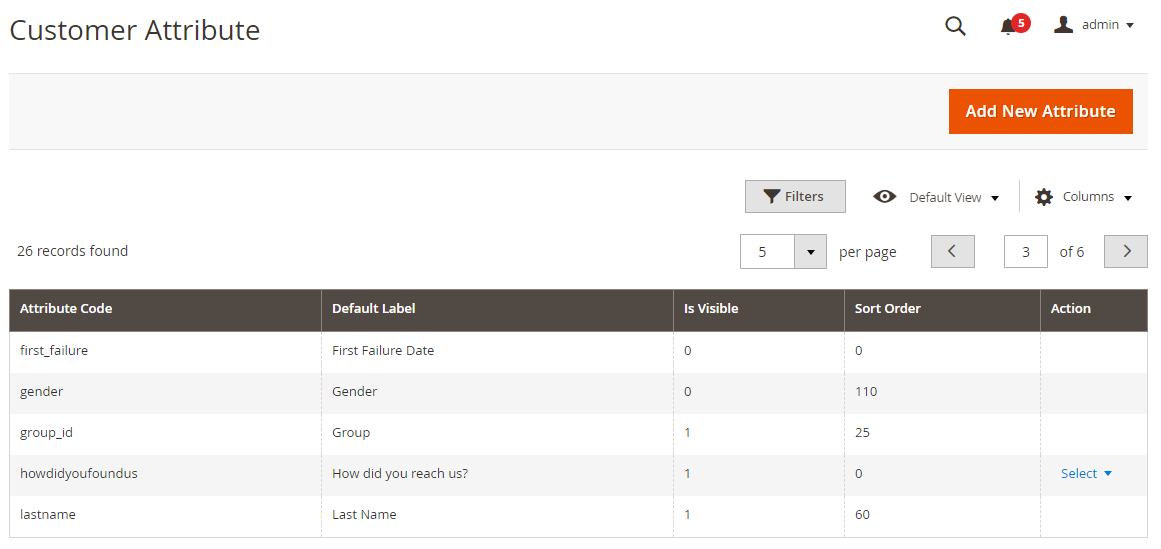
Grid to list all customers attributes and filter them according to the requirement.

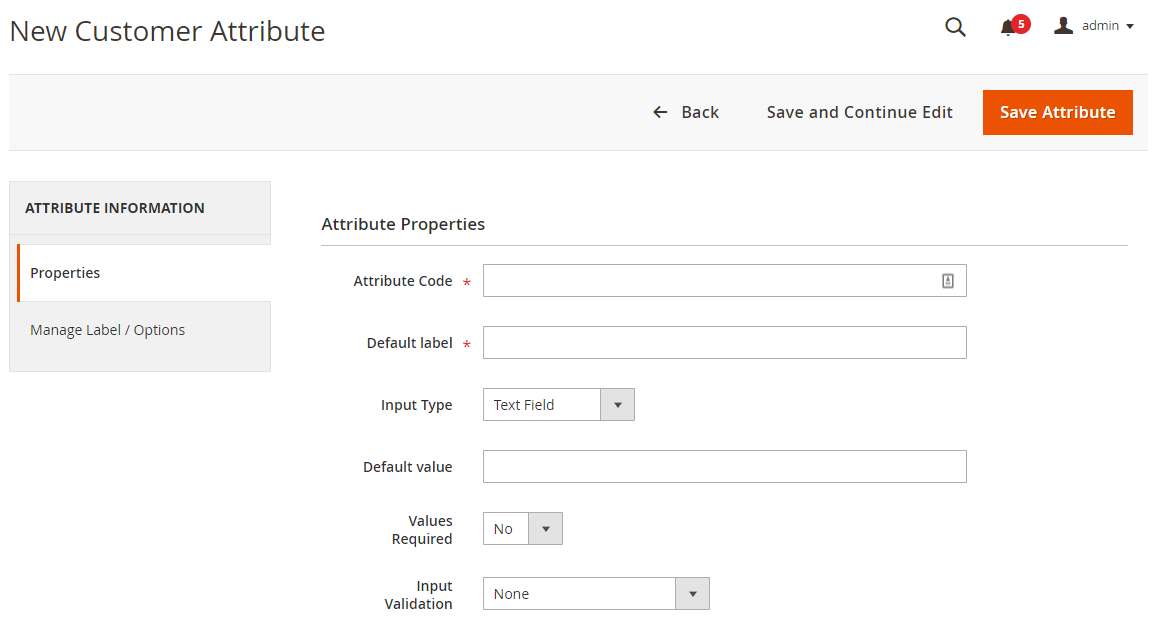
- Attribute Code: Provide customer attribute code.
- Default label: Provide default label.
- Input Type: Select input type for the customer attribute values. i.e. text box, drop down list, check box, radio buttons, etc.
- Default value: Provide default attribute values if any.
- Values Required: Select “Yes” to make attribute value required /mandatory.
- Input Validation: Select input validation if you would like to apply. i.e. alphanumeric, numeric, URLs, emails, only alphabets, etc.

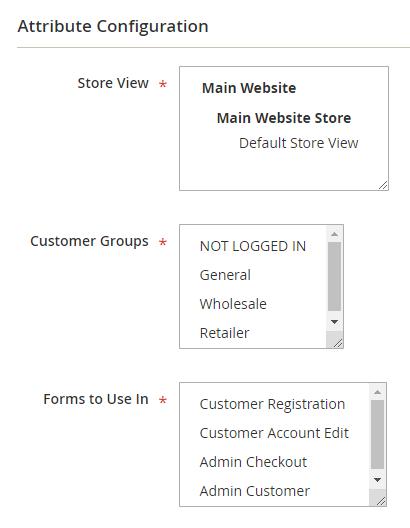
- Store View: Select store views to allow customer attributes.
- Customer group: Select customer groups you would like to enable customer attributes. By this way you can create customer group specific attributes.
- Forms to Use In: Select the Magento forms to display this attribute to customer. For example, you can only show customer attribute only on customer registration page by selecting “Customer Registration”.

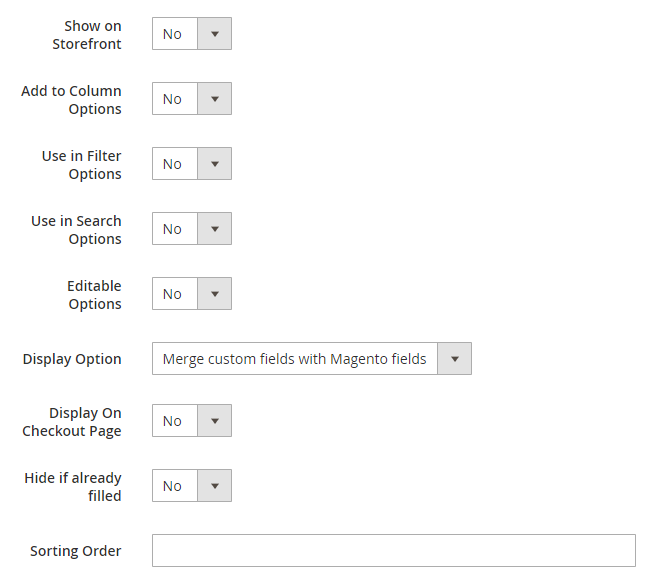
- Show on Storefront: Select “Yes” to show customer attribute on store front.
- Add to Column Options: Select “Yes” to add attribute to Grid column.
- Use in filter options: Select “Yes” to use attribute in filter options.
- Use in search options: Select “Yes” to use attribute in search options.
- Editable Options: Select “Yes” to make attribute editable by customer from My account section.
-
Display Options: Select option either display with default Magento or as a separate section.
We hope we cleared out everything regarding the configuration of the Magento 2 Customer Attribute Extension. If you feel we missed out on anything or get stuck during the process, feel free to reach out.


 (2 votes, average: 4.50 out of 5)